How to Upgrade Ssd on Laptop
To upgrade the SSD on a laptop, first confirm your laptop’s type of SSD interface and buy a compatible SSD. Next, back up your data and use appropriate tools to swap the old SSD for the new one.
Upgrading a laptop’s SSD is a practical way to enhance performance and storage capacity. This process begins with selecting the correct solid-state drive that is compatible with your specific laptop model. Laptops typically use 2. 5-inch SATA drives or M.
2 drives, so knowing which one fits your system is crucial. It is important to have a clear backup of your existing data to prevent any loss during the transition. The right tools, usually a small screwdriver, are needed to access the laptop’s internals safely. Careful handling and following the manufacturer’s instructions ensure a successful upgrade. With a new SSD, laptops benefit from quicker boot times, faster data retrieval, and overall improved system responsiveness.
Key Takeaway
Introduction To Ssd Upgrades
Are you considering breathing new life into your laptop with a cutting-edge SSD upgrade? With solid-state drives (SSDs) becoming more affordable and accessible, it’s an ideal time to make the switch from traditional hard drives (HDDs). This upgrade can lead to a significant performance boost, turning your sluggish laptop into a high-speed machine. In this blog post, we’ll navigate through the essentials of SSD technology, uncover the transformative benefits of upgrading, and help you assess your laptop’s compatibility for an SSD makeover. Get ready to supercharge your computing experience!
Understanding Ssd Technology
Solid-state drives (SSD) are a revolutionary leap in data storage technology. Unlike HDDs, SSDs have no moving parts, which translates to faster data retrieval times. At the core of SSDs are NAND flash memory chips that store data even when powered off, ensuring durability and efficiency. SSDs connect via various interfaces such as SATA or the faster NVMe over PCI Express (PCIe), with NVMe SSDs offering lightning-fast speeds that dramatically improve loading times and system responsiveness.
Benefits Of Upgrading To An Ssd
Here are just a few compelling reasons to upgrade to an SSD:
- Speed: An SSD vastly outperforms HDDs, slashing boot-up, loading, and transfer times.
- Reliability: With no mechanical parts, SSDs are less prone to failure and data loss.
- Energy Efficiency: SSDs draw less power, contributing to longer battery life on laptops.
- Silent Operation: The absence of moving parts means SSDs operate silently.
- Shock Resistance: SSDs can withstand bumps and drops better, an important factor for laptop users on the go.
Is Your Laptop Eligible For An Ssd Upgrade?
Determining if your laptop supports an SSD upgrade involves a few considerations:
- Confirm hardware compatibility: Check if your laptop has a compatible bay or slot for an SSD—SATA or PCIe/NVMe.
- Find out about space constraints: An SSD must physically fit into your laptop, which is often a 2.5-inch drive bay or an M.2 slot for PCIe/NVMe SSDs.
- Ascertain the maximum storage capacity supported by your laptop’s motherboard to ensure the new SSD will function correctly.
- Check for BIOS or firmware compatibility, as some older systems may require an update to work with modern SSDs.
Once these factors are assessed and you confirm a green light for compatibility, you’re set for the thrilling experience of upgrading to an SSD.
Pre-upgrade Preparations
Embarking on an SSD upgrade for your laptop can give your old machine a new lease on life. Before the transformation begins, a carefully planned approach is essential to ensure a smooth and successful upgrade. The following steps will guide you through the essential preparations to protect your data and choose the optimal hardware for a flawless transition.
Backing Up Your Data
Before swapping out your current drive, it’s critical to safeguard your files. Losing your photos, documents, or applications is not an option. Use an external hard drive, cloud storage, or cloning software to create a complete backup of your laptop’s contents. Here’s a simple checklist:
- Identify important files and folders.
- Choose your backup method: External, Cloud, or Cloning.
- Perform the backup, double-checking to ensure completeness.
Choosing The Right Ssd For Your Laptop
Selecting the perfect SSD is not just about capacity; it’s also about compatibility and form factor. First, identify your laptop’s requirements, which could vary from SATA to NVMe, depending on its age and model. Consider the following:
| Factor | Details |
|---|---|
| Form Factor | 2.5-inch, mSATA, or M.2 |
| Interface | SATA III, PCIe, NVMe |
| Capacity | 250GB to 2TB commonly |
| Performance | Read/write speeds |
Note the existing HDD/SSD’s specifications and opt for an SSD with the same or higher standards to ensure compatibility.
Gathering The Necessary Tools
Securing the right tools prior to the upgrade ensures a seamless process. Here’s what you’ll need:
- Screwdrivers: Typically a Phillips #0 or #1, depending on the laptop.
- Anti-static Wrist Strap: To prevent damaging the laptop’s internal components with static electricity.
- USB to SATA Adapter (optional): If you plan to clone your existing drive.
- SSD Mounting Bracket (if necessary): Some laptops may require a bracket to securely fit a 2.5-inch SSD.
Assemble your tools, schedule some uninterrupted time, and prepare for an upgrade that will improve your laptop’s performance significantly.
Step-by-step Guide To Upgrading Your Ssd
Welcome to our comprehensive guide on upgrading the SSD in your laptop. Are you looking to enhance your laptop’s performance, increase storage space or simply breathe new life into an older model? An SSD upgrade can be the perfect solution. This step-by-step guide is crafted to assist you through the process, ensuring a smooth and efficient upgrade experience. Let’s dive into the key phases of the upgrade process with detailed instructions.
Safety Precautions And Initial Steps
Before proceeding with your SSD upgrade, prioritize safety and preparation. This is essential not only for the well-being of your hardware but for yours as well.
- Power down your laptop completely and unplug all cables.
- Ground yourself to prevent static electricity from damaging internal components. Use an anti-static wrist strap or periodically touch a grounded metal object.
- Prepare a clean and static-free workspace to perform the upgrade.
- Collect all necessary tools, such as a screwdriver and possibly prying tools specific to your laptop model.
- Ensure you have a backup of your data in case of unexpected issues during the upgrade process.
Removing The Existing Drive
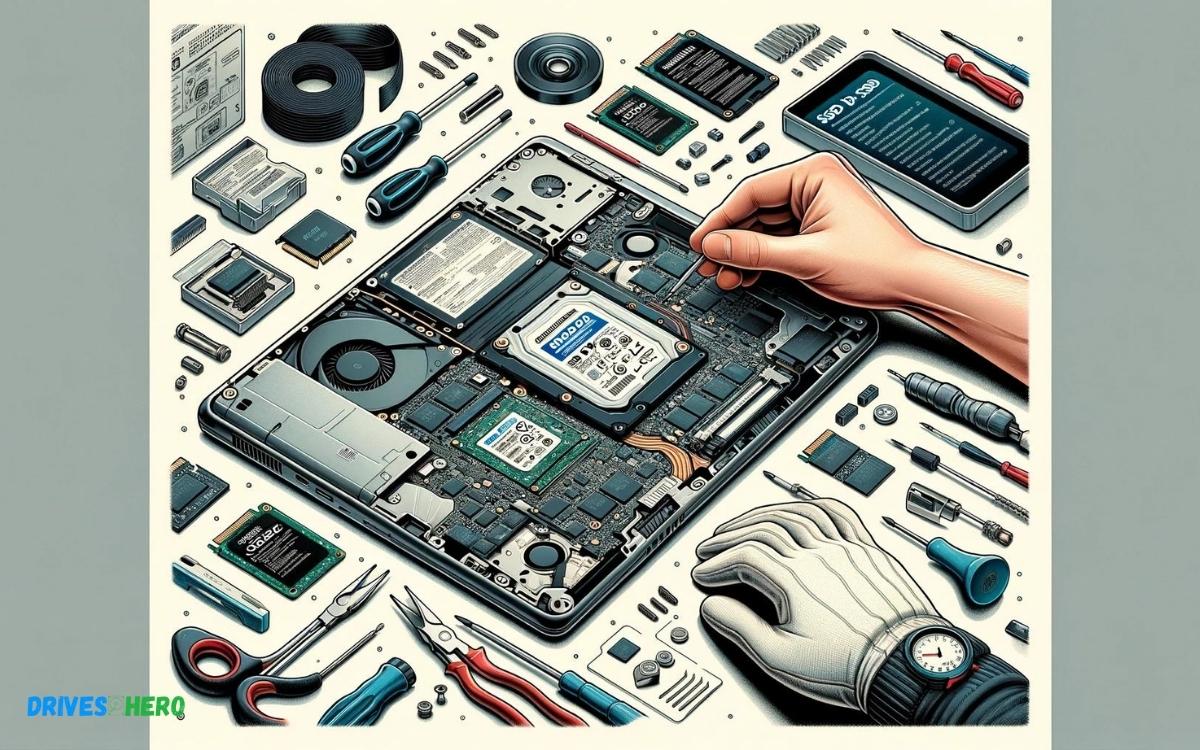
Accessing and removing your current SSD is the first physical step in the upgrade process. Each laptop model will have a slightly different method of accessing the drive bay, so refer to your laptop’s service manual for model-specific instructions.
- Locate and remove the screws securing the back panel or drive access door.
- Gently remove the panel or door, and locate the SSD.
- Unscrew any screws holding the SSD in place.
- Carefully lift the edge of the SSD and unplug it from the socket.
Take note of the orientation and alignment of the original SSD as it will guide you in installing your new drive correctly.
Installing The New Ssd
With the old drive removed, it’s time to install the new SSD. Verify that the new SSD is compatible with your laptop before beginning.
- Align the new SSD with the notch on the socket correctly.
- Insert the SSD gently into the socket at an angle, similar to how the original SSD was positioned.
- Press down on the SSD so that it lies flat and secure it with the retaining screw.
- Double-check that the SSD is firmly connected and has no loose edges or corners.
Reassembling The Laptop
The final stage involves reassembling your laptop. It’s important to ensure everything is back to its original place.
- Position the back panel or drive access door back onto the laptop).
- Secure it using the screws you previously removed.
- Reattach any cables, such as the battery or power cable, and boot up the laptop.
- Head to the BIOS/UEFI to confirm that the new SSD is recognized by your system.
Upon successful boot, you may need to format the new SSD or restore from backup depending on your upgrade path. Your laptop is now ready for a more responsive and enhanced performance.
Post-upgrade Actions
Congratulations on successfully upgrading your laptop’s SSD! But before you get back to your high-speed computing life, there are important post-upgrade actions to consider. These steps ensure that your system runs smoothly and that you make the most of your SSD’s capabilities. From installing the operating system to optimizing performance, let’s walk through what you need to do next.
Installing The Operating System
Now that your new SSD is in place, it’s time for a fresh start. Begin by installing an operating system (OS). If you have a Windows laptop, you can create a bootable USB drive with the Windows Installation Media. For Mac users, macOS Recovery is your go-to for a system install. Here’s a quick guide:
- Windows: Boot from the USB drive and follow the prompts to install Windows. Make sure to select the SSD as the destination drive.
- Mac: Hold the Command (⌘) and R keys during startup to enter Recovery Mode, then choose ‘Reinstall macOS’ and select the SSD as your install location.
Restoring Backed-up Data
Next up, it’s essential to restore all your backed-up data to your new drive. Assuming you took the sage advice to back up prior to the SSD upgrade, you can now transfer files back onto your laptop. Utilize external drives, cloud storage, or data restoration software for this task, ensuring you maintain file integrity and that no precious data is lost in the process.
- Connect the backup storage device or access your online backup service.
- Locate the backup files or use the restore function provided by your backup software.
- Select the files you wish to restore and begin the transfer to the new SSD.
Optimizing Ssd Performance
To experience the true potential of your SSD, proper optimization is key. This includes enabling the TRIM command, which helps the SSD run more efficiently, and ensuring that your BIOS is set to AHCI mode for optimum performance. Dive into the settings and make these adjustments:
| Action | Description |
|---|---|
| Enable TRIM | Commands the OS to inform the SSD which blocks of data are no longer in use and can be wiped internally. |
| Set BIOS to AHCI | Enables advanced features like Native Command Queuing (NCQ) for faster data access and better performance. |
| Disable Defragmentation | Traditional defragmentation is unnecessary and could reduce the lifespan of an SSD. Ensure it’s turned off. |
Troubleshooting Common Ssd Upgrade Issues
Encountering glitches after an SSD upgrade is not uncommon. You might face issues such as the system not recognizing the new SSD or slow performance. A few strategic fixes can resolve most hiccups:
- Check connections: Confirm that the SSD is properly connected to the motherboard.
- Update drivers and firmware: With the latest SSD firmware and compatible drivers, ensure your operating system communicates effectively with the new hardware.
- BIOS settings: Enter your laptop’s BIOS and ensure the SSD is detected and correctly configured.
With these crucial steps handled, your laptop should be ready to take on any task with newfound quickness and efficiency. Remember, post-upgrade actions are as significant as the upgrade itself, setting the stage for streamlined computing and peak SSD performance.
Maintaining Your Ssd-equipped Laptop
Once you’ve successfully upgraded your laptop with a solid-state drive (SSD), it’s crucial to maintain it properly to ensure optimal performance and longevity. An SSD-equipped laptop will not only boot faster and load applications more swiftly but also has specific maintenance requirements. Understanding how to keep your SSD in top condition is paramount for getting the most out of your investment. Let’s explore some key strategies to maintain your laptop’s SSD.
Regular Updates And Health Checks
Keeping your SSD’s firmware and your laptop’s software up to date is largely beneficial for performance and security. Manufacturers often release firmware updates that can improve drive functionality and rectify issues. Software updates for your laptop can also include optimization features that enhance how your operating system interacts with your SSD, leading to smoother operation.
- Check with your SSD manufacturer for firmware updates regularly.
- Enable automatic software updates for your operating system.
- Use SSD management software to routinely monitor the drive’s health, including its temperature, remaining life, and any potential errors.
Understanding Ssd Lifespan And Wear
All SSDs have a finite lifespan, which is generally measured by the number of write cycles. Each cell in an SSD can only be written to a certain number of times before it begins to wear out. While this might sound alarming, most modern SSDs have a life span that’s well beyond the typical usage demands of a laptop.
| Factors Affecting SSD Wear | Impact |
|---|---|
| Type of NAND used | Determines write cycles |
| Amount of data written | More data written accelerates wear |
| Operating temperature | Higher temperatures can exacerbate wear |
Monitoring tools can help you keep an eye on your SSD’s ‘Total Bytes Written’ (TBW), giving you a gauge on its relative health and remaining lifespan.
Best Practices For Ssd Longevity
Maximizing the lifespan of your SSD involves adopting best practices that mitigate undue stress. Here are several effective strategies:
- Avoid unnecessary writes. For instance, disable or limit the usage of hibernation mode, which writes a large amount of data to the SSD.
- Keep a good amount of free space on the SSD. Using all available storage can increase wear and reduce performance due to a lack of free blocks.
- Optimize your operating system settings. Certain features like TRIM support can help the SSD manage unused data more effectively.
- Manage your storage workload. Spread data-intensive tasks over time rather than in large, infrequent bursts.
By following these guidelines, you can ensure that your SSD remains reliable and efficient, helping your laptop to perform at its best for years to come.
Conclusion
Upgrading your laptop’s SSD is a game-changer for performance and speed. With the right tools and guidance, you can rejuvenate your device hassle-free. Embrace the boosted efficiency and storage of your newly upgraded laptop, and enjoy the seamless operation that comes with it.
It’s an investment that pays off in swift computing experiences.

Harold Williams is a senior writer and technical editor at Drives Hero with 20+ years of experience in IT administration. He specializes in storage systems, SSD reviews, and performance testing, bringing real-world insight to every guide.