Where is the Screw for M.2 Ssd? Placement Guide!
The screw for the M.2 SSD is typically located on the motherboard of your computer. It is often positioned directly next to or near the M.2 slot, where the SSD is inserted.
The M.2 SSD (Solid State Drive) is a type of storage device that is used in computers. It is inserted into an M.2 slot on the motherboard. The screw is a small, usually silver component that is used to secure the SSD in place once it is inserted in the slot.
Locating the M.2 SSD screw is a pivotal step in upgrading your computer’s storage.
This small component ensures the M.2 SSD is securely connected to the motherboard, thereby, preventing any potential damages or losses in data. Therefore, knowing its location is crucial to the successful installation of SSD.
10 Different Motherboard Model & Their Screw Location
| Motherboard Model | M.2 SSD Screw Location |
|---|---|
| ASRock B450M Pro4 | Above the M.2 slot |
| ASUS ROG Strix B450-I | Between the M.2 slot and the SATA ports |
| Gigabyte B450 Aorus M | Under the M.2 Heatsink |
| MSI B450M PRO-VDH MAX | Right side of the M.2 slot |
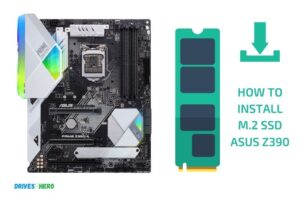
| ASUS Prime Z390-A | Between the M.2 slot and the PCIe slot |
| MSI MPG Z490 GAMING PLUS | Under the M.2 Shield Frozr |
| ASRock Z390 Pro4 | Above the M.2 slot |
| Gigabyte Z390 AORUS ULTRA | Under the M.2 Thermal Guard |
| ASUS TUF Gaming X570-PLUS | Between the M.2 slot and the PCIe slot |
| MSI MAG B550 TOMAHAWK | Under the M.2 Shield Frozr |
Key Takeaway

Five Facts About the Screw Placement for M.2 SSDs
Why The Screw For M.2 Ssd Is Important
Explain The Significance Of The Screw With Regard To The M.2 Ssd
When building a pc or upgrading an existing one, you may come across an m. 2 ssd. This is a type of solid-state drive that offers lightning-fast read and write speeds.
In order to install this device to your motherboard, there is a small yet significant part that you should not overlook – the screw that comes with the ssd.
Discussion Of How The Screw Is Used To Secure The Ssd Into The Motherboard
The screw that comes with the m. 2 ssd plays a vital role in securing the device into the motherboard.
This tiny screw fits into a small hole on the motherboard’s m. 2 slot and keeps the ssd securely in place. Without this screw, the ssd may not sit properly, which could lead to damage or malfunctioning.
Here’s how to secure m. 2 ssd with the screw:
- Place the ssd onto the m.2 slot position on the motherboard correctly.
- Align the small hole that is present on the m.2 ssd with the screw threads present in the m.2 slot.
- Rotate the screw gently with your fingers to fix the ssd securely on the motherboard.
Mention The Potential Risks Of Not Having The Screw In Place
If you fail to secure the m. 2 ssd with its screw, this device may shift or judder from its original position. This won’t just cause damage to the ssd, but may also lead to unreliability issues or even data loss.
So, if the screw is not used, it may result in:
- Overheating of the ssd due to lack of appropriate connection to the motherboard.
- Data loss or damage due to forced separation of the ssd, causing connection disturbance.
- Malfunctioning of the system due to unreliable data transmission.
Highlight Suitable Alternatives To Secure Ssd If The Screw Is Unavailable
In case the screw is lost or you have an m. 2 ssd without a screw, there are other alternatives available to secure it into the motherboard.
Here are a few possible ways to fix m. 2 ssd without screw:
- You can use a strip of double-sided adhesive tape to fix the ssd onto the motherboard. This adhesive must be high quality and able to support the weight of the ssd.
- Another option is to use an m.2 heat sink or thermal pad, which may involve additional cost but can help prevent overheating of the ssd.
- Or simply purchase a replacement screw from your local hardware store or online supplier.
The screw for m. 2 ssd is a small yet significant component that plays a vital role in ensuring your system’s stability and reliability.
It may be easy to overlook, but it’s essential to install it correctly to avoid the risks of overheating, data loss, or other issues.
Remember that there are alternatives available if you lose the screw, but fixing the m. 2 ssd with a suitable screw is the best option.
Where To Search For The Screw For M.2 Ssd
When it comes to installing a new m. 2 ssd, one of the most common issues that people face is searching for the tiny screw that holds the ssd firmly in place.
The screws used for securing the m. 2 ssds are small and hard to notice, which makes it somewhat challenging to locate them for people who do not have much experience in hardware installation.
In this section, we will discuss various locations where the screw is commonly found to help you in your search.
Check the m.2 ssd packaging
Most of the time, the screw required to hold the m. 2 ssd in place is included in the packaging of the m. 2 ssd itself. Check the packaging thoroughly, and make sure not to miss the small plastic bag that often contains the small screws, as it can be tough to spot.
Check your motherboard bag
In some cases, the m. 2 screws are included in the motherboard bag. Therefore, it’s worth going back to the motherboard packaging and checking to see if the screw is in there.
Check the motherboard itself
Sometimes, the m. 2 screw is already installed in the motherboard, in its predetermined location. Carefully inspect the motherboard to check if the screw is already in place.
Typical Types Of Screws Used For M.2 Ssds
M. 2 ssds use different types of screws to hold them in place, depending on the specific model and manufacturer of the ssd.
However, the most common types of screws include:
Standoff screws
These screws use spacers that come in different lengths, and they are used to lift the m. 2 ssd off the motherboard to provide more airflow and cooling for better performance.
Phillips head screws
These screws are the most commonly used for m. 2 ssds. They are the most efficient and easy to screw into place.
Torx head screws
Some ssd manufacturers use these screws for added security and to prevent people from using standard screwdrivers to remove their m. 2 ssd.
Solutions To Find Screws
If you have searched through the m. 2 ssd packaging and motherboard packaging and still cannot locate the screw, do not panic. There are other solutions to help you locate them, including:
Check your spare screws
Check if you have any spare screws of the same size and shape as the m. 2 ssd screw from any previous hardware or computer build. You might get lucky and have a screw that works with your m. 2 ssd.
Contact the manufacturer or retailer
Suppose you still cannot find the screw, you can contact the manufacturer or retailer. They might send you the missing screw, or they might direct you to a hardware store where you can purchase a replacement.
Important Measures To Avoid Damaging The Screw
Installing m. 2 ssds can be quite challenging, so it’s essential to avoid damaging the screw during the installation process.
- Use the right-sized screwdriver: Use a screwdriver that fits the screw properly. Do not use bigger or smaller sizes because it will damage the screw and your motherboard.
- Apply gentle pressure: Apply gentle and steady pressure when you are screwing the screw. Do not apply excessive pressure, as you might damage the screw head or motherboard itself
- Do not overtighten the screw: Overtightening the screw can cause it to break the m. 2 ssd or twist off, leaving part of the screw stuck inside the motherboard, making it challenging to remove.
How To Install The Screw For M.2 Ssd
Detailed Steps To Follow During The Installation Of The Screw For M.2 Ssd
The screw for m. 2 ssd is crucial when it comes to installing your favorite solid-state drive.
However, finding the screw can be tricky as it can vary depending on the brand and type of motherboard you are using.
Here are the detailed steps to follow during the installation of the screw for m. 2 ssd to avoid any mistakes.
- Acquire the screw: The screw usually comes with the motherboard or the ssd packages. If not, you can purchase one from a computer hardware store.
- Locate the screw location: Check your motherboard manual to identify the location of the m.2 slot. Generally, it is on the top portion of the board near the cpu socket. Identify the type of screw required and ensure it matches the size of the gap.
- Secure the screw: Once you have located the gap, position the screw in the slot and hold it into place. Then, turn it in a clockwise direction to tighten it using a small screwdriver.
- Avoid overtightening the screw: Make sure that the screw is snug, not too tight or loose. Over-tightening could damage the m.2 ssd or the motherboard resulting in expensive repairs.
Visual Representation Of The Different Stages Of The Installation Process
Here is a visual representation of the different stages of the installation process of a screw for m. 2 ssd:
- Identify the screw gap on the motherboard near the cpu socket.
- Option to insert the m.2 ssd before or after attaching the screw.
- Position the screw into the slot.
- Tighten the screw clockwise with a small screwdriver.
- Check that the screw is snug, not too tight or too loose.
Tips On How To Avoid Common Mistakes Made During The Installation
Installing the screw for m. 2 ssd is relatively easy. However, there are common mistakes that individuals make, which can lead to complications.
Here are some tips to avoid making those mistakes:
- Familiarize yourself with your motherboard manual to locate the m.2 slot and screw position.
- Identify the type of screw required and ensure it matches the size of the gap.
- Tighten the screw clockwise with appropriate force, but avoid over-tightening.
- Before attaching the screw, ensure that the m.2 ssd is oriented correctly.
- Avoid handling the m.2 ssd components excessively to prevent damage and protect data integrity.
The Importance Of Testing After The Installation To Confirm The Screw Is Functioning Correctly
Once you have installed the screw for m. 2 ssd, it is essential to test and confirm that everything is functioning correctly. Testing will ensure that your system recognizes the new ssd and that everything is running smoothly.
Here are a few steps to follow to test after installation:
- Reboot your computer and enter the bios. Go to the boot menu and check whether the system finds the newly installed m.2 ssd.
- If the ssd is found, continue booting into the operating system. Check if the ssd is recognized and whether it appears in the device manager.
- Ensure that the ssd is displaying the correct storage capacity, and run benchmark tests on the read and write performance to know whether it is operating optimally.
Overall, installing the screw for m. 2 ssd is a relatively easy process that requires only a few steps. Follow the detailed installation steps, avoid common mistakes, and test after installation to ensure your ssd functioning optimally.
FAQ On M.2 Ssd Screw
What Is An M.2 Ssd Screw?
An m. 2 ssd screw is a tiny screw used to secure m. 2 ssd into a motherboard.
Where Can I Find M.2 Ssd Screws?
M. 2 ssd screws usually come with your motherboard or ssd. You can also get them from local hardware stores.
What Size Is An M.2 Ssd Screw?
The size of an m. 2 ssd screw is usually 2-3mm in length and 1mm in diameter.
Can I Install An M.2 Ssd Without A Screw?
It is not recommended to install an m. 2 ssd without a screw. It may cause your ssd to get loose over time.
Conclusion
Finally, finding the screw for an m. 2 ssd can be a daunting task for some, but it’s an easy job once you know where to look. Remember to check your motherboard manual for guidance on how to install an m. 2 ssd and where the screw is located.
If the manual isn’t available, a quick search of the motherboard manufacturer’s website should do the trick. Also, it’s essential to remember that m. 2 ssd screws come in different sizes, so don’t try to use a screw that’s too big or too small.
With the proper screw and some patience, you should be able to install your m. 2 ssd in no time. The addition of an m. 2 ssd can significantly improve your computer’s speed and performance, making it well worth the effort of finding the screw.
So go ahead and take on this task with confidence, and you’ll be rewarded with a faster, more efficient system.

Harold Williams is a senior writer and technical editor at Drives Hero with 20+ years of experience in IT administration. He specializes in storage systems, SSD reviews, and performance testing, bringing real-world insight to every guide.