How to Replace M 2 Ssd? A Step-by-Step Guide
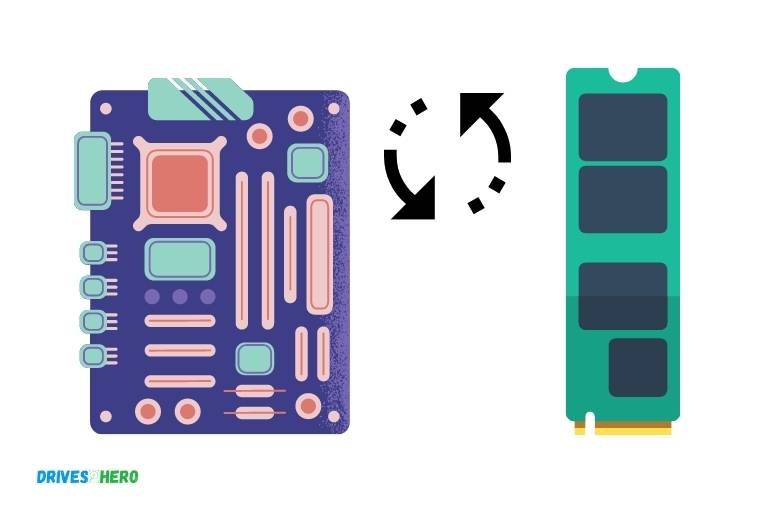
To replace an M.2 SSD, follow these steps: power off your system, locate the existing M.2 SSD, remove it carefully, insert the new M.2 SSD, and reassemble your system.
M.2 SSDs are compact storage devices that come in different form factors and are used in a variety of devices such as laptops, desktops, and gaming consoles.
Replacing an M.2 SSD involves a few simple steps, but it’s important to do it correctly to ensure that your device functions properly and that you don’t damage any components.
Before attempting to replace your M.2 SSD, make sure you have a compatible replacement available. Check your device’s documentation to find the supported form factors and specifications for M.2 SSDs.
Also, create a backup of your important data before starting the replacement process, as you’ll need to transfer this data onto the new SSD.
Following these steps will ensure a smooth and successful M.2 SSD replacement experience.
Steps to Replace an M.2 SSD
| Step | Description |
|---|---|
| 1 | Turn off the computer and disconnect all cables |
| 2 | Open the computer case or access the M.2 SSD slot |
| 3 | Locate the M.2 SSD on the motherboard |
| 4 | Remove the screw(s) securing the M.2 SSD |
| 5 | Gently slide out the old M.2 SSD from the slot |
| 6 | Insert the new M.2 SSD into the slot, aligning the notches |
| 7 | Secure the new M.2 SSD with the screw(s) |
| 8 | Close the computer case or M.2 SSD compartment |
| 9 | Reconnect all cables and power on the computer |
| 10 | Enter the BIOS/UEFI to ensure proper detection of the new M.2 SSD |
| 11 | If necessary, install the operating system and/or migrate data to the new M.2 SSD |
Key Takeaway

Five Facts About Replacing an M.2 SSD
Understanding M 2 Ssd: What It Is And How It Works
Solid state drives (ssds) are the go-to storage drives for modern computer systems.
However, the latest storage solution to hit the market is the m 2 ssd, which offers even faster speeds and superior performance compared to traditional storage drives.
In this section, we will take a closer look at m 2 ssd technology, its advantages, components, and how it works.
Introduction To M 2 Ssd Technology
M 2 ssd is a solid-state drive that utilizes the m 2 interface to connect to the system’s motherboard. It’s among the latest storage solutions and is increasingly becoming popular among tech-savvy individuals.
Here’s what you need to know about m 2 ssds:
- They use the non-volatile memory express (nvme) protocol for faster data transfer.
- They come in different lengths and sizes, including 22mm, 42mm, 80mm, and 110mm.
- They don’t have moving parts, which means they’re more durable than traditional storage drives.
The Advantages Of M 2 Ssd Over Traditional Storage Drives
Besides faster read and write speeds, m 2 ssds have several advantages over traditional storage drives.
Let’s look at some of these advantages:
- They take up less space, making them suitable for thinner and lighter systems.
- They produce less heat, reducing the risk of damage and prolonging the drive’s lifespan.
- They consume less power, resulting in longer battery life for laptops and other portable devices.
- They’re faster in booting up and launching applications.
Components Of An M 2 Ssd And How They Differ From Other Storage Drives
M 2 ssds consist of several components, such as the controller, nand flash memory, and the interface connector.
Here’s a breakdown of how these components differ from those of traditional storage drives:
- Controller: M 2 ssds use a more advanced controller that handles data transfer and other operations much faster.
- Nand flash memory: M 2 ssds use the latest nand flash memory, which is faster but more expensive than the flash memory used in traditional storage drives.
- Interface connector: M 2 ssds use the m 2 interface, which allows for faster data transfer and takes up less space than the sata interface used in traditional storage drives.
M 2 ssds offer faster read and write speeds, superior performance, and several other advantages over traditional storage drives.
They’re also built with advanced components, including a faster controller and the latest nand flash memory.
These features make m 2 ssds a top-choice storage solution for computer systems, especially for those looking to upgrade their devices’ performance and speed.
Preparing For Replacement: Things To Consider Before Replacing M 2 Ssd
Identifying M 2 Ssd Compatibility With Your Device
If you are planning to replace your m 2 ssd, the first step is to identify the compatibility of the new ssd with your device.
Consider the following points before making a purchase:
- Check the form factor of your current ssd and find a replacement with the same size and type.
- Look for the interface type supported by your motherboard; pcie or sata. Make sure to buy the ssd that supports your motherboard’s interface type.
- Check the maximum storage capacity that your motherboard can support.
Taking Backups And Data Transfer Options
Before replacing your m 2 ssd, it is essential to take backups of your data and have data transfer options available.
Consider the following points:
- Take a complete backup of your current ssd to a hard drive or external storage device.
- Use cloning software to clone your old ssd onto the new one.
- Make sure that you have created a bootable usb drive with a windows installation media before replacing your ssd.
Identifying The Tools And Accessories Required
Replacing an m 2 ssd requires specific tools and accessories.
Ensure that you have the following tools and accessories before starting:
- A screwdriver that fits the screws on your device.
- Thermal pads or thermal paste to ensure that your new ssd is cooled correctly.
- An anti-static wrist strap to protect your new ssd from electrostatic discharge.
- A user manual to understand the installation process thoroughly.
Replacing an m 2 ssd is a technical process that requires careful consideration of compatibility, data transfer options, and tools needed.
By preparing correctly before replacing your m 2 ssd, you can avoid any damage to your device and ensure that the process is hassle-free.
Step-By-Step Guide: Replacing Old M 2 Ssd With A New One
Are you running out of storage space and noticing slow loading times on your computer? Replacing your old m 2 ssd with a new one could solve these problems.
Here’s a step-by-step guide on how to do it.
Disassembling The Device
Before replacing the old m 2 ssd with a new one, you need to disassemble your device.
To do this, follow these steps:
- Turn off your computer and unplug any cables.
- Remove the back cover of your laptop using a screwdriver.
- Look for the m 2 ssd and unscrew it using a small screwdriver.
- Carefully and slowly remove the old m 2 ssd by pulling it out of the slot.
Removing The Old M 2 Ssd
To remove the old m 2 ssd, perform the following steps:
- When removing the old m 2 ssd, be careful not to bend or touch the connector pins.
- Carefully and slowly remove the old m 2 ssd by pulling it out of the slot.
- If there’s a thermal pad on the old m 2 ssd, remove it and apply it on the new m 2 ssd.
- Set aside the old m 2 ssd as you will dispose of it later.
Inserting The New M 2 Ssd
Now it’s time to insert the new m 2 ssd:
- Insert the new m 2 ssd into the slot by aligning it with the connector pins.
- Gently push the new m 2 ssd down until it clicks into place.
- If applicable, attach the thermal pad from the old m 2 ssd to the new m 2 ssd.
- Before reassembling your device, ensure that the new m 2 ssd is installed firmly and securely.
Reassembling The Device
After inserting the new m 2 ssd, it’s time to reassemble your device. Here’s how:
- Reattach the back cover of your laptop using a screwdriver.
- Plug in all cables and turn on your computer.
- If your computer doesn’t start up, go to the bios and verify that the new m 2 ssd is detected and set as the primary disk.
- Install the operating system or migrate the data to the new m 2 ssd, and you’re good to go.
There you have it, a step-by-step guide on how to replace your old m 2 ssd with a new one. With this guide, you can now enjoy faster loading times and more storage space on your computer. Happy upgrading!
Troubleshooting Common Issues
Replacing an m. 2 ssd can be a daunting task, especially for beginners. However, with the right guidance and a bit of patience, you can successfully upgrade your computer’s storage without any hassle.
That being said, let’s talk about some of the most common issues encountered while replacing the m.
2 ssd and how to troubleshoot them.
Providing Solutions To The Most Common Issues Faced While Replacing M.2 Ssd
If you run into any of the following issues while replacing your m. 2 ssd, try the suggested solutions to get back on track.
- M.2 ssd not detected: If your system doesn’t detect the new ssd, it could be due to various reasons. First, ensure that the ssd is properly inserted into the slot. If that doesn’t help, check if the slot is functional by inserting a known good ssd. If the slot works fine, you might need to update the bios to ensure compatibility with the new ssd.
- Booting issues: Once you’ve replaced the m.2 ssd, your system might have trouble booting. Ensure that you’ve installed the operating system on the new ssd and made it the primary boot device. If you’ve cloned the old drive to the new one, ensure that you’ve cloned all the partitions. You can also try disabling secure boot or enabling legacy boot in the bios.
- Slow performance: If you’re experiencing slow read/write speeds on the new ssd, ensure that you’ve installed the latest drivers for the ssd. Additionally, check if the ssd is running in the proper mode (ahci/raid/nvme) and if the slot is utilizing the proper number of pci lanes.
Troubleshooting And Resolving Issues During The Process
Here are some of the most common issues that you might face during the process of replacing the m. 2 ssd and how to troubleshoot them.
- Cable management issues: While replacing the m.2 ssd, you might have to remove cables and connectors, which can be challenging to put back in order. Take a picture of the cables before removing them and label them properly. When reattaching the cables, ensure that they’re attached firmly and in the correct orientation.
- Static discharge: Static electricity can damage your ssd or other components, so it’s essential to take precautions to prevent it. Wear an esd strap or touch a grounded object before handling any components. Additionally, work in a static-free environment and avoid wearing synthetic clothes.
- Compatibility issues: Before purchasing a new ssd, ensure that it’s compatible with your system. Check the manufacturer’s website for compatibility information and ensure that the slot is of the correct type (sata or nvme). If you’re unsure, consult with a professional or contact the manufacturer’s support team.
Don’t worry if you run into any issues while replacing the m. 2 ssd – it’s normal. Just follow the troubleshooting steps we’ve discussed, and you’ll have your system running smoothly in no time.
Now that you know how to troubleshoot and resolve common issues, you’re ready to upgrade your computer’s storage like a pro.
Frequently Asked Questions Of How To Replace M 2 Ssd
How Can I Determine The Type Of M.2 Ssd My Computer Uses?
You can check the specifications of your motherboard or laptop to find out the type of m. 2 ssd your device uses.
Alternatively, you can use software programs like cpu-z or hwinfo for more detailed information.
Do I Need Any Special Tools To Replace An M.2 Ssd?
You will need a screwdriver as well as an antistatic wrist strap to replace an m. 2 ssd. The antistatic wrist strap will prevent any static electricity from damaging the ssd.
Can I Install An M.2 Ssd Even If My Computer Doesn’T Have An Existing One?
Yes, you can install an m. 2 ssd even if there isn’t an existing one in your computer. However, you need to ensure that your motherboard has an m. 2 slot.
What Are Some Common Mistakes To Avoid While Replacing An M.2 Ssd?
Common mistakes to avoid while replacing an m. 2 ssd include forgetting to back up important data, damaging the m. 2 slot or the ssd while installing, using the wrong type of ssd, and forgetting to ground yourself before the installation.
Conclusion
To sum it up, replacing an m. 2 ssd can seem daunting at first, but with the right tools and instructions, it can be a smooth and easy process.
It is essential to make sure that the new ssd is compatible with your system and that you have backed up your data beforehand.
The steps to replace the m. 2 ssd involve opening the case, locating the m. 2 slot, releasing the old ssd, inserting the new one, and securing it in place.
Afterward, it’s crucial to check that the system recognizes the new ssd and that everything runs smoothly.
If you encounter any issues, it’s advisable to seek professional help.
By following these steps, you can enjoy better performance and speed with your new m. 2 ssd, and you won’t have to worry about storage issues.


