Optimizing Storage on a Gaming PC for Faster Performance
Modern games regularly clock in at 50GB to over 100GB each. Install a handful of AAA titles alongside Windows, your drivers, and a few creative apps, and suddenly that 1TB NVMe you were so proud of is gasping for space. The problem isn’t just about running out of room, though. A packed drive actively hurts your PC’s performance, from longer boot times to stuttering in-game asset loading.
The good news is that optimizing storage on a gaming PC doesn’t require a complete rebuild. With the right multi-drive strategy, a few smart habits, and a clear understanding of storage tiers, you can keep your system snappy and your game library accessible. Here’s how to set it all up.
Why a Single Drive Isn’t Enough for Gaming
A single SSD handling everything, your operating system, game installs, screenshots, video captures, and downloads, creates a bottleneck you might not immediately notice. As the drive fills past 70-80% capacity, write speeds degrade, Windows has less room for virtual memory and temp files, and your SSD’s internal garbage collection starts working overtime. If you’ve noticed your PC slowing down over time, there are real technical reasons why SSDs lose speed as they age and fill up.
A multi-drive setup solves this by giving each type of data its own lane. Your OS gets a fast, lean boot drive. Your most-played games live on a separate high-speed SSD. Older titles and bulk storage sit on a larger, more affordable drive. This tiered approach keeps every drive operating in its sweet spot.
The Ideal Multi-Drive Setup for a Gaming PC
Think of your storage in three tiers. You don’t need all three from day one, but understanding the tiers helps you plan upgrades intelligently.
Tier 1: The Boot Drive (500GB to 1TB NVMe)
This is your C: drive. It should hold Windows, your drivers, essential productivity apps, and nothing else you can avoid. A 500GB NVMe SSD is the minimum here, though 1TB gives you more breathing room. The Samsung 990 Pro 1TB is a top-tier pick for a boot drive, with blazing Gen4 read/write speeds that make Windows feel instantaneous.
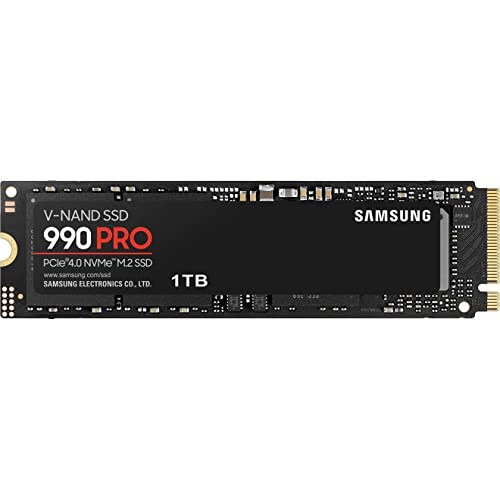
Samsung 990 Pro 1TB NVMe SSD
Outstanding Gen4 NVMe speeds and excellent endurance ratings make this an ideal boot and primary game drive.
Keep this drive under 60% full at all times. That means aggressively redirecting your Downloads folder, Documents, and game installs to other drives. If you’re curious about the differences between NVMe and traditional SATA drives for gaming specifically, our real-world comparison of SATA vs NVMe gaming performance breaks down where you’ll actually notice the speed difference.
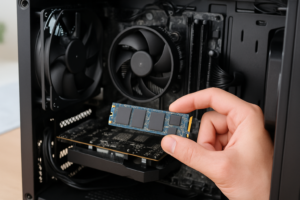
Tier 2: The Game Drive (1TB to 2TB NVMe or SATA SSD)
This is where your actively played games live. A second NVMe SSD is ideal if your motherboard has a spare M.2 slot. If not, a 2.5-inch SATA SSD works perfectly fine for most games. The WD Black SN770 2TB hits a sweet spot between speed and capacity for a dedicated game drive.
Choosing between a 1TB and 2TB drive depends on how many games you keep installed simultaneously. If you’re always juggling between five or six large titles, 2TB is worth it. For help deciding, our guide on choosing between 1TB and 2TB SSDs covers the practical tradeoffs.

WD Black SN770 2TB NVMe SSD
Excellent mid-range NVMe drive with generous 2TB capacity, perfect as a dedicated game library drive.
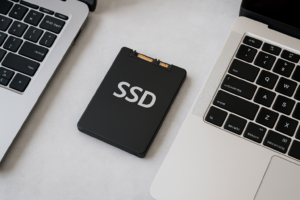
Tier 3: The Archive Drive (2TB+ HDD or Budget SATA SSD)
Games you play once a month, screenshots, recordings, installers, and backups all belong here. A traditional HDD like the Seagate Barracuda 4TB is still the most affordable way to get massive capacity. You won’t get SSD-level load times, but for games that aren’t load-time sensitive (think indie titles, strategy games, older releases), an HDD is perfectly acceptable. If you want a deeper comparison between the two technologies, our SSD vs HDD guide covers the latest pros and cons.
How to Move Games Between Drives Without Re-downloading
You don’t need to uninstall and re-download a game just to shift it to another drive. Most game launchers now support moving installs natively.
- Steam: Go to Settings > Storage, then click the game and select “Move” to a different Steam Library folder. You can create new library folders on any drive from this same menu.
- Epic Games Launcher: There’s no built-in move feature yet (frustrating, I know). The workaround is to copy the game folder to the new drive manually, uninstall from Epic, then reinstall and point it to the new location. Epic will verify files instead of re-downloading.
- Xbox/Game Pass: Go to Settings > Storage in the Xbox app, select the game, and use the “Move” option to shift it to another drive.
- EA App: Similar to Epic, you’ll need to manually move the folder, then update the install path in the app’s settings and trigger a repair.
Get in the habit of moving games you haven’t launched in two weeks off your fast Tier 2 drive and onto your archive drive. This keeps your game SSD lean and performing at its best.
Keeping Your Boot Drive Lean and Fast
Your C: drive accumulates junk faster than you’d expect. Windows updates leave behind old installation files, temp folders bloat, and apps love to default-install on C: even when you tell them not to. Here’s a practical maintenance checklist:
- Run Disk Cleanup monthly. Search “Disk Cleanup” in Windows, select your C: drive, and check all boxes. Pay special attention to “Previous Windows installations” and “Windows Update Cleanup,” which can free up 10GB or more.
- Redirect default folders. Right-click your Downloads, Documents, Videos, and Pictures folders in File Explorer, go to Properties > Location, and point them to your Tier 2 or Tier 3 drive.
- Change default install paths. In Windows Settings > System > Storage > Where new content is saved, set everything except “New apps” to your secondary drive.
- Disable or manage hibernation. The hiberfil.sys file can eat up as much RAM as you have installed. If you never use hibernation, run
powercfg -h offin an admin Command Prompt to reclaim that space. - Clear shader caches periodically. Games and GPU drivers store shader caches that can grow into multiple gigabytes. You’ll find them in AppData folders and in your NVIDIA or AMD settings.
These steps alone can often reclaim 20-40GB on a cluttered boot drive.
Using Storage Tiers Effectively Day to Day
Having multiple drives only helps if you actively manage what goes where. A simple rule of thumb works well in practice:
- Playing this week? It goes on the NVMe game drive.
- Might play this month? It stays on the archive SSD or HDD.
- Haven’t touched it in three months? Uninstall it. You can always re-download or move it back.
For games with DirectStorage support (and that list is growing), you’ll want them on an NVMe drive specifically. DirectStorage allows the GPU to decompress assets directly from the SSD, but it relies on NVMe speeds to deliver its full benefit. SATA SSDs won’t give you the same improvement.
If you’re running an older system and want to squeeze more life out of existing hardware, pairing an SSD with a legacy HDD can still make a real difference. Our guide on using an SSD and HDD together in one PC walks through the exact setup process.

Samsung 870 EVO 2TB SATA SSD
Reliable and fast SATA SSD with large capacity, great for a secondary game library on systems without extra M.2 slots.
Frequently Asked Questions
Does it matter which M.2 slot I use for my boot drive?
Yes, it can. Most motherboards have one M.2 slot wired directly to the CPU and one or more routed through the chipset. The CPU-direct slot offers the lowest latency and should be used for your boot drive. Check your motherboard manual to identify which slot connects directly to the CPU. It’s usually the one closest to the processor socket.
Will moving games to an HDD cause noticeable performance issues?
It depends on the game. Open-world games with heavy asset streaming (like Cyberpunk 2077 or Starfield) will have noticeably longer load times and may even stutter during gameplay on an HDD. Turn-based games, strategy titles, and older games generally run fine. Use your NVMe for any game where load times or texture pop-in bothers you, and relegate the rest to the HDD.
How do I know when my SSD is too full to perform well?
Most SSDs start showing measurable slowdowns once they pass 75-80% capacity. You can check your drive’s health and remaining capacity in Windows by searching for “Storage” in Settings. For a more detailed look, free tools like CrystalDiskInfo will show you SMART data including total bytes written and drive health percentage. If you’re concerned about long-term wear, our article on how long SSDs really last puts real endurance data into perspective.
This article contains affiliate links. We may earn a small commission at no extra cost to you.
James Kennedy is a writer and product researcher at Drives Hero with a background in IT administration and consulting. He has hands-on experience with storage, networking, and system performance, and regularly improves and optimizes his home networking setup.