Steam Deck Storage Upgrade Guide: Best MicroSD and Internal NVMe Options
The Steam Deck ships with enough storage to get you started, but it won’t take long before you’re staring at a “Storage Full” warning after installing a handful of AAA titles. Games like Elden Ring, Cyberpunk 2077, and Starfield can each eat 50-100 GB, and the base model’s 64 GB eMMC storage fills up before you’ve finished your first download.
Fortunately, Valve designed the Steam Deck with upgradability in mind. You have two paths to more space: popping in a microSD card (takes about 10 seconds) or swapping the internal 2230 NVMe SSD (takes about 20 minutes). This guide walks you through both options, with specific product recommendations, a compatibility list, and step-by-step installation instructions so you can get back to gaming with room to spare.
Understanding Steam Deck Storage: What You’re Working With
Every Steam Deck model, including the LCD and OLED variants, features a microSD card slot and an internal M.2 2230 NVMe SSD slot. The key difference between SKUs is what’s already installed inside:
- 64 GB eMMC (original LCD base model): The slowest internal storage. This is the model that benefits most from an NVMe swap.
- 256 GB NVMe SSD: Decent for a moderate library, but you’ll fill it fast with modern titles.
- 512 GB / 1 TB NVMe SSD: The premium options. You might still want a microSD card for your indie game collection.
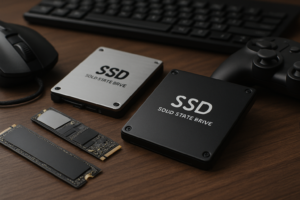
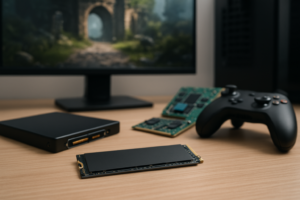
The M.2 2230 form factor is smaller than the 2280 drives you’ll find in most desktop PCs and laptops. If you’re familiar with the differences between M.2 and 2.5-inch SSDs, think of 2230 as the compact sibling of the standard M.2 stick. It’s 22mm wide and 30mm long, and using the wrong size simply won’t fit. This is the most common mistake people make, so double-check the form factor before ordering.
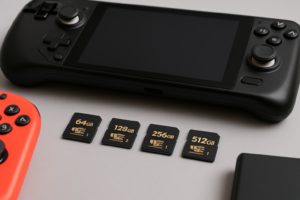
Path 1: MicroSD Card Expansion (The Easy Route)
Adding a microSD card is the simplest upgrade you can make. Slide it into the slot on the bottom edge of the Steam Deck, format it through SteamOS, and you’re done. You can install games directly to the card or move existing games over from internal storage.
What to Look For in a MicroSD Card
Not all microSD cards perform equally in the Steam Deck. You want a UHS-I card with A2 (Application Performance Class 2) rating for the best results. The Steam Deck’s card reader maxes out at UHS-I speeds, so paying extra for a UHS-II card won’t give you any advantage.
Here’s what matters:
- Speed class: Look for A2-rated cards. They handle random read/write operations better, which translates to faster game load times.
- Capacity: 512 GB hits the sweet spot for most people. 1 TB cards are available but cost significantly more per gigabyte.
- Brand reliability: Stick with Samsung, SanDisk, or Lexar. Cheap no-name cards often fail or deliver speeds far below what’s advertised.
Best MicroSD Cards for Steam Deck
The Samsung PRO Plus 512 GB is my top pick. It consistently delivers sequential read speeds around 160 MB/s in real-world testing, and Samsung’s cards have an excellent track record for longevity. The A2 rating means random I/O performance is strong too, which keeps game load times reasonable.
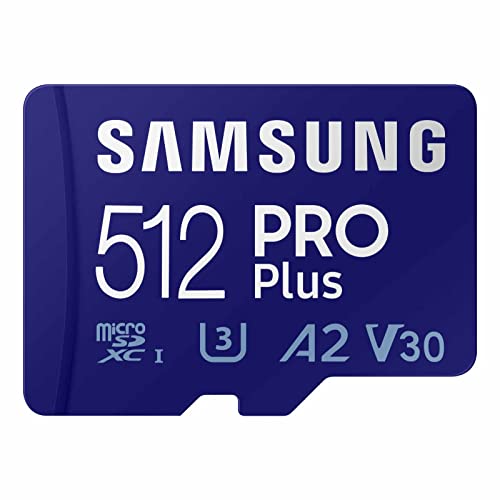
Samsung PRO Plus 512GB MicroSD Card
Top-performing A2-rated microSD with consistent speeds and excellent reliability for Steam Deck gaming.
The SanDisk Extreme 512 GB is another excellent choice that trades blows with the Samsung in benchmarks. Both are A2-rated and perform nearly identically in the Steam Deck. Go with whichever one has better pricing when you’re ready to buy.
For a budget-friendly option, the Samsung EVO Select 512 GB delivers solid performance at a lower price point. You’ll see slightly lower sustained write speeds compared to the PRO Plus, but for loading and playing games, the difference is negligible. Keep in mind that storage devices can slow down over time, and microSD cards are no exception, so formatting the card periodically through SteamOS can help maintain performance.
If you want the maximum capacity available, the SanDisk Extreme 1 TB gives you a massive library on a single card. Check current pricing on Amazon, as 1 TB cards have been dropping steadily.
MicroSD Installation and Formatting
- Power on your Steam Deck and navigate to Settings > Storage.
- Insert the microSD card into the slot on the bottom edge of the device. You’ll feel it click into place.
- SteamOS will detect the card. Select Format SD Card when prompted.
- Wait for formatting to complete (usually under a minute).
- When installing new games, you’ll now see the option to choose between internal storage and the microSD card.
To move existing games to the card, go to the game’s properties in your library, navigate to Local Files, and select Move Install Folder. The transfer speed depends on the game’s size and your card’s write speed.
Path 2: Internal NVMe SSD Swap (The Performance Upgrade)
Replacing the internal SSD is a bigger commitment, but the performance gains are substantial, especially if you’re upgrading from the 64 GB eMMC model. An NVMe drive delivers significantly faster read and write speeds than any microSD card. If you’re curious about the real-world impact of NVMe versus slower storage, our SATA vs NVMe gaming performance tests show how much faster load times can get.
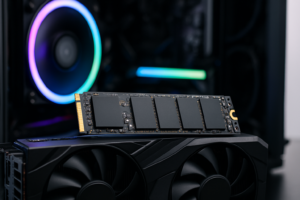
Compatible 2230 NVMe SSDs
The Steam Deck requires a single-sided M.2 2230 NVMe drive. Double-sided drives (with NAND chips on both sides of the PCB) can cause fitment issues or interfere with the EMI shield. Here are the drives confirmed to work:
- Western Digital SN740 (1 TB / 2 TB): The community favorite. Fast, reliable, and widely available in 2230 format. This is the same drive Valve uses in higher-end Deck models.
- Sabrent Rocket 2230 (1 TB): A solid alternative with PCIe Gen 4 support. The Steam Deck only uses Gen 3, so you won’t get Gen 4 speeds here, but it’s fully forward-compatible if you ever repurpose the drive.
- Corsair MP600 Mini (1 TB): Built specifically for handheld gaming devices. Good thermal performance and a reputable warranty.
- Samsung PM991a (1 TB): An OEM drive often available through third-party sellers. Affordable and well-tested in the Deck community.
My top recommendation is the WD SN740 in 1 TB. It offers the best balance of speed, thermals, and proven compatibility.

Western Digital SN740 1TB 2230 NVMe SSD
The go-to internal SSD upgrade for Steam Deck, offering proven compatibility, excellent speeds, and low thermals.
A quick note on capacity: 1 TB is the sweet spot for most Steam Deck owners. The 1 TB vs 2 TB capacity decision comes down to how large your active game library is. If you regularly rotate between 15-20 modern titles, 1 TB paired with a microSD card gives you plenty of flexibility. If you absolutely refuse to uninstall anything, 2 TB drives are available in 2230 format but carry a premium.
Tools You’ll Need
- Phillips #1 screwdriver
- A plastic spudger or guitar pick (for prying the back cover)
- Tweezers (helpful for handling the tiny SSD screw)
- A USB-C flash drive or microSD card with the SteamOS recovery image
- A second computer to download and create the recovery media
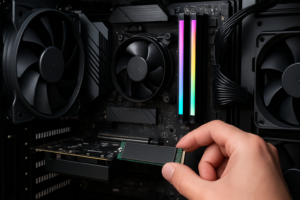
Step-by-Step Internal SSD Installation
Before starting, back up any data you want to keep. You’ll be reinstalling SteamOS from scratch, so saves stored only locally will be lost. Enable Steam Cloud sync for your games beforehand. If you’re interested in how backing up to a NAS works, our guide on setting up automated backups covers the basics, though for the Steam Deck, Steam Cloud is the simplest solution.
- Power down completely. Hold the power button and select “Shut Down.” Don’t just put it to sleep.
- Remove the back cover. Unscrew the eight Phillips screws on the back panel. Note that the four center screws are shorter than the four corner screws, so keep them organized. Gently pry the back cover off starting from the top edge using a plastic spudger.
- Disconnect the battery. This is critical for safety. Use tweezers or a spudger to gently pull the battery ribbon cable connector away from its socket. Do not skip this step.
- Remove the EMI shield. The SSD sits beneath a metal shield held in place by a single screw (or tape, depending on your model). Remove the screw and lift the shield carefully.
- Swap the SSD. Remove the small Phillips screw securing the existing drive. The old SSD will pop up at an angle. Slide it out and insert the new 2230 NVMe drive at the same angle, then press it flat and replace the securing screw.
- Reassemble. Replace the EMI shield, reconnect the battery cable, and snap the back cover into place. Reinstall all eight screws.
- Reinstall SteamOS. Download the official SteamOS recovery image from Valve’s website on another computer. Flash it to a USB-C drive using Balena Etcher or Rufus. Boot the Steam Deck while holding Volume Down + Power to enter the boot menu, select your USB drive, and follow the on-screen recovery process.
The entire process takes about 15-20 minutes if you’ve watched a video walkthrough first. If you’ve ever installed an NVMe SSD in a desktop, the process is similar but on a smaller scale. Take your time with the ribbon cables, as they’re delicate.

Sabrent Rocket 2230 1TB NVMe SSD
Gen 4 drive at a competitive price, perfect for Steam Deck owners who may also want to use the drive in a future device.
MicroSD vs. Internal NVMe: Which Should You Choose?
Both upgrades serve different purposes, and many Steam Deck owners end up doing both. Here’s how they compare:
- Speed: Internal NVMe drives are roughly 3-5x faster than the best microSD cards for sequential reads. You’ll notice shorter load times, especially in open-world games with heavy asset streaming.
- Capacity options: MicroSD cards top out at 1 TB. Internal 2230 NVMe drives go up to 2 TB.
- Ease of installation: MicroSD is plug-and-play. NVMe requires opening the device and voiding your warranty seal (though Valve has been understanding about this).
- Hot-swapping: You can carry multiple microSD cards and swap between them. Your internal drive stays put.
My advice: if you own the 64 GB eMMC model, prioritize the internal NVMe swap. The jump from eMMC to NVMe is enormous in terms of load times and overall system responsiveness. If you already have a 256 GB or larger NVMe model, start with a 512 GB microSD card and only upgrade the internal drive if you find yourself constantly managing storage.
Performance Tips After Upgrading
Once you’ve expanded your storage, a few tweaks will help you get the most out of it:
Set your default install location. In SteamOS, go to Settings > Storage and set your preferred default. I recommend keeping your most-played games on the internal NVMe and using the microSD for titles you play less frequently.
Enable Shader Pre-Caching. Go to Settings > Shader Pre-Caching and make sure it’s turned on. This downloads pre-compiled shaders so your games don’t stutter while building shader caches on first launch. Having faster storage makes this process quicker.
Monitor your drive health. If you’re running Desktop Mode, you can install tools like KDE Partition Manager or smartctl to check your SSD’s health. Modern NVMe drives have impressive endurance ratings, but it’s good practice to keep an eye on things. If you want to understand more about how long your new drive should last, our James Kennedy is a writer and product researcher at Drives Hero with a background in IT administration and consulting. He has hands-on experience with storage, networking, and system performance, and regularly improves and optimizes his home networking setup.![]()