NVMe Shows in BIOS but Not Windows Installer
You’re trying to install Windows on a brand new NVMe drive. You boot into the BIOS, and there it is, listed clear as day under storage devices. But the second you get to the Windows installer screen and click “where do you want to install Windows,” the drive is nowhere to be found. It’s a frustrating spot to be in, especially when the hardware is clearly detected and working.
The good news is that this is one of the most common NVMe issues out there, and it almost always comes down to a handful of specific causes. This guide walks you through exactly how to figure out which one applies to you, without wasting time on fixes that don’t matter for your situation.
First, Confirm Exactly Where the Drive Disappears
Before you touch any settings, you need to know precisely where the drive shows up and where it doesn’t. This determines which fix actually applies to your situation, and skipping this step is the number one reason people waste hours on the wrong solution.
- BIOS/UEFI: If the drive shows here, the physical connection and motherboard slot are working. That’s confirmed.
- Windows Installer: This is where you’re stuck. Note whether the drive is completely absent or shows up grayed out with a message about missing drivers.
- Device Manager (in a working OS): If you can boot into another OS or a live USB, check if Windows sees the controller at all.
- Disk Management: Shows whether the drive is initialized, has a partition, or appears as unallocated space.
If your drive appears in BIOS but is completely invisible in the Windows installer, with no error message and no “load driver” prompt, that points to a driver or controller mode issue nearly every time. If it shows up but says something like “Windows cannot be installed on this disk,” that’s a partitioning or disk format problem instead. Keep that distinction in mind as you work through the sections below.
Fix #1: Check Your SATA/AHCI/RAID Mode in BIOS
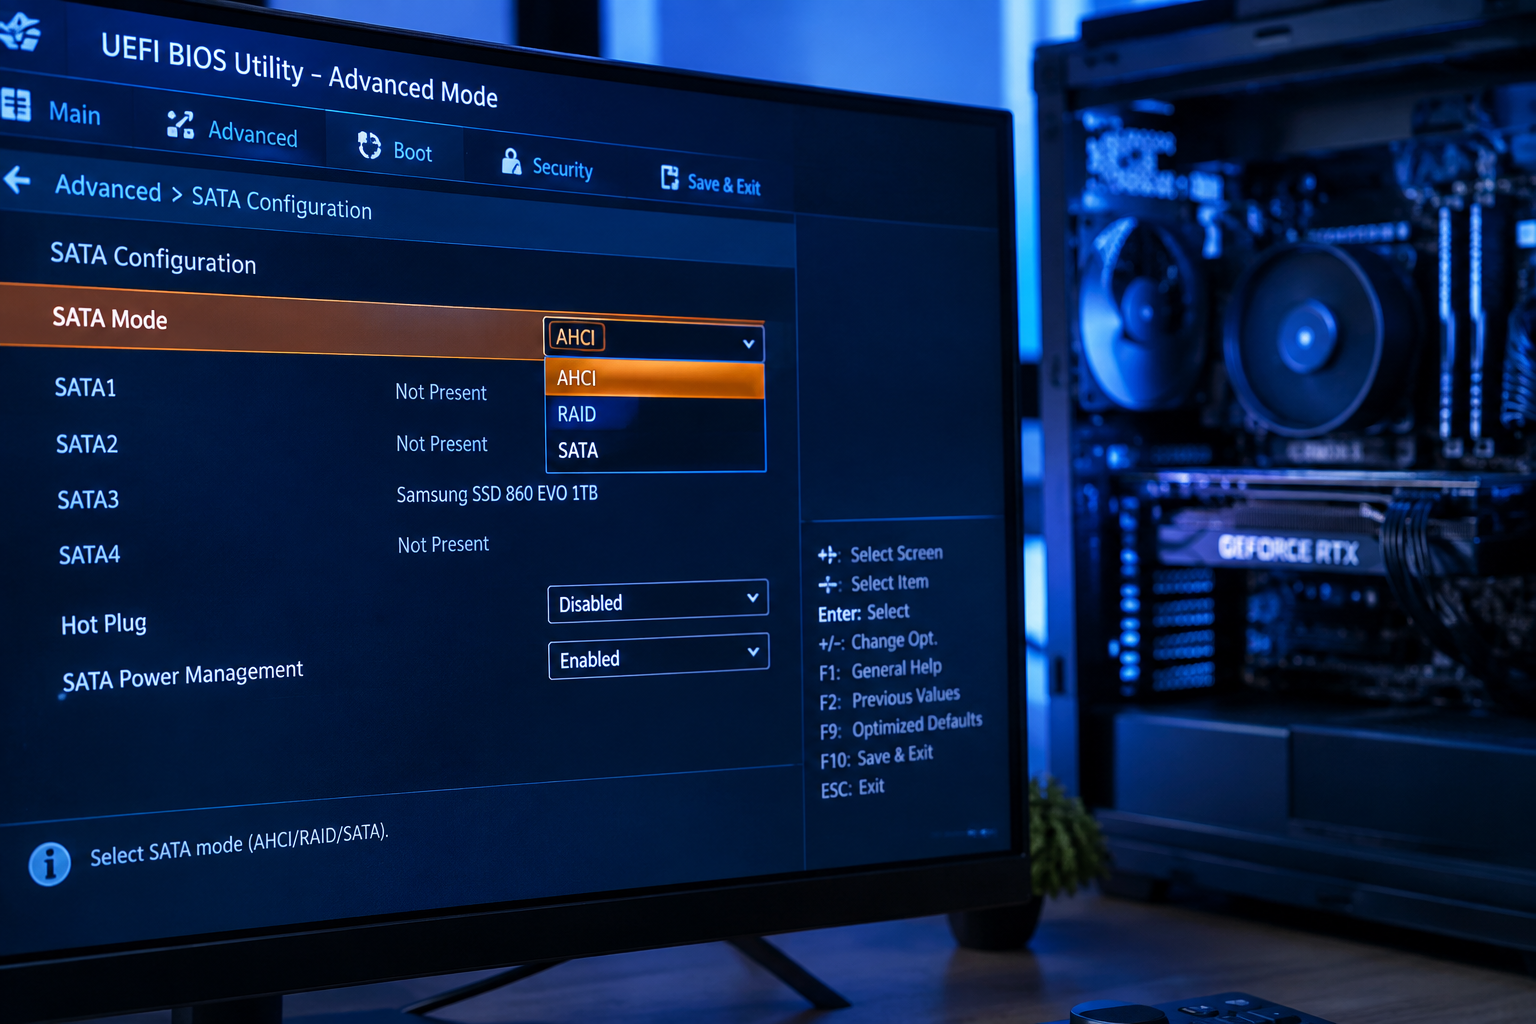
This is the single most common cause of an NVMe drive vanishing from the Windows installer while still showing in BIOS. Most motherboards ship with storage controllers set to RAID mode (sometimes labeled Intel RST or Intel VMD), and the standard Windows installer doesn’t include drivers for that mode out of the box.
Here’s what to check in your BIOS or UEFI settings, usually under Advanced or Storage Configuration:
- Look for a setting called SATA Mode, Storage Controller Mode, or similar.
- If it’s set to RAID or Intel RST/VMD, that’s very likely your problem.
- Switching to AHCI mode often resolves the issue immediately for a single-drive NVMe setup with no RAID array in use.
If you actually need RAID or VMD mode (for example, you’re running multiple NVMe drives in a RAID array), don’t switch it off. Instead, you’ll need to load the correct Intel RST or VMD driver during Windows setup. Most motherboard manufacturers provide this driver as a downloadable file you put on a separate USB drive, then load it using the “Load Driver” button on the installer’s drive selection screen.
This is also a good moment to think about which type of storage actually fits your build. If you’re deciding between NVMe and older SATA-based drives for a new build, our breakdown of NVMe SSD vs Intel SSD covers the practical differences worth knowing before you commit to a configuration.
Fix #2: Load the Correct NVMe/VMD Driver During Setup
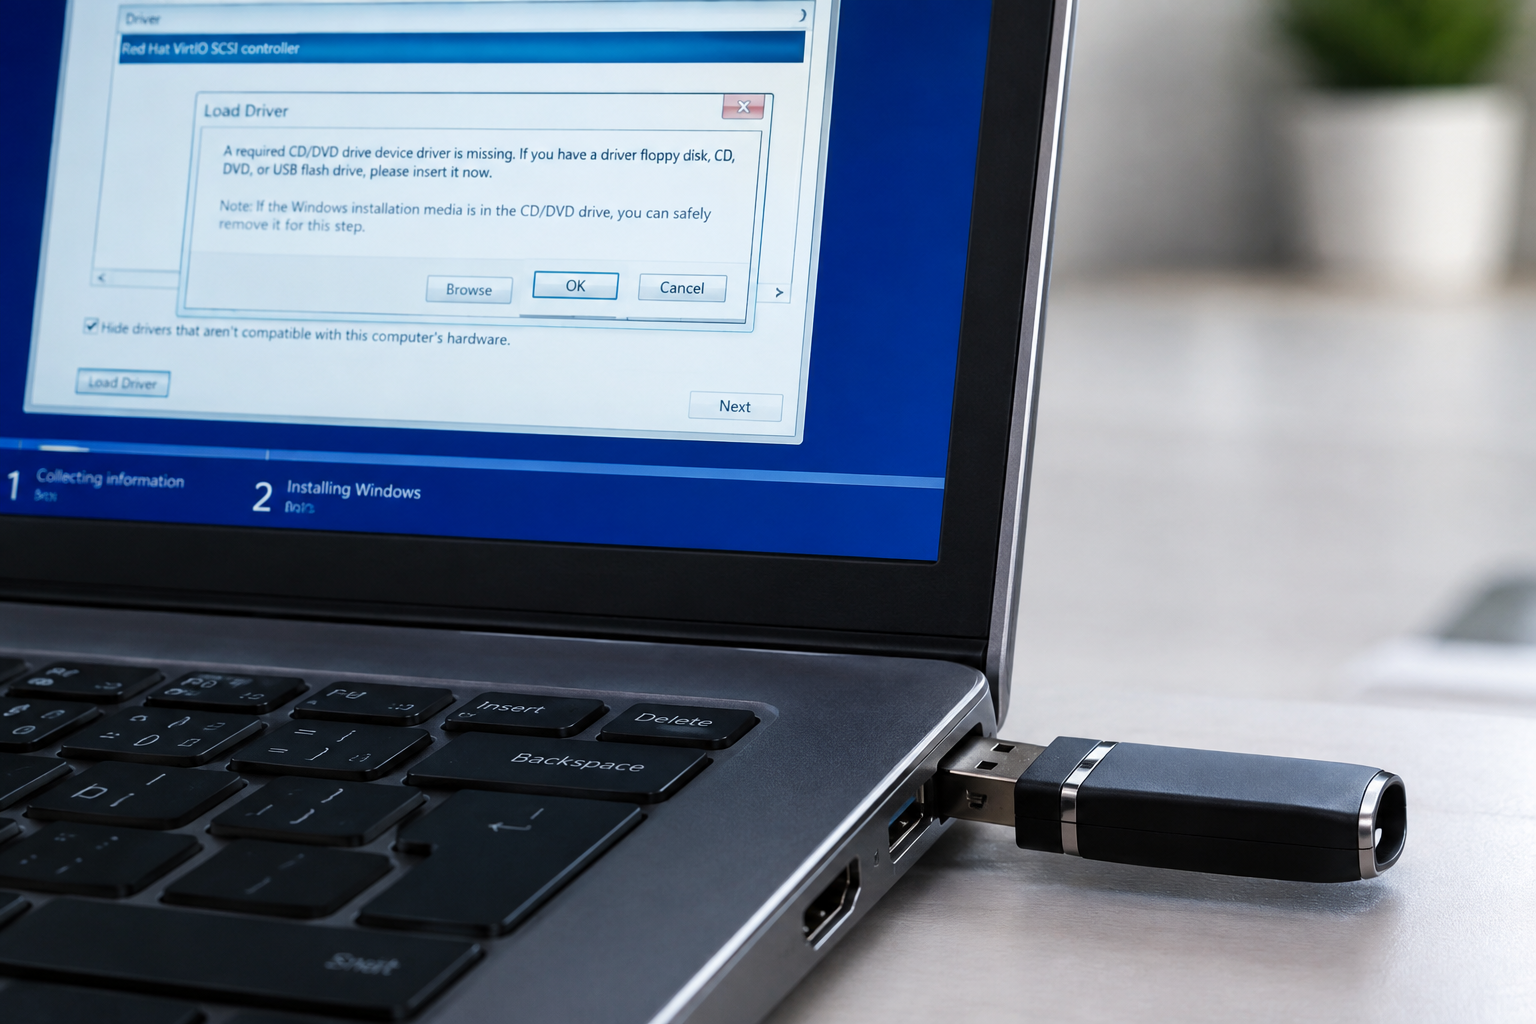
If your drive shows in BIOS but the Windows installer shows nothing at all, even after switching to AHCI, you may need a driver regardless. This is especially true on newer laptops and prebuilt systems using Intel VMD, which is a separate layer from standard AHCI or RAID and requires its own driver package.
- Download the Intel VMD or RST driver from your motherboard or laptop manufacturer’s support page, not a generic Intel download, since these are often model specific.
- Extract the files onto a second USB flash drive (not the one running the Windows installer).
- On the “Where do you want to install Windows” screen, click “Load Driver.”
- Browse to the USB drive and select the correct driver file for your Windows version.
Once the driver loads, your NVMe drive should appear in the list. If it still doesn’t, double check that you grabbed the driver for your exact chipset generation, since an 11th-gen Intel VMD driver won’t necessarily work on a 13th-gen board.
Fix #3: The Drive Shows Up But Won’t Let You Install
Sometimes the NVMe drive does appear in the installer, but Windows refuses to let you use it, or it displays as unallocated space with a warning. This is a different problem entirely and usually means the drive needs to be prepared rather than needing a driver.
Common messages and what they mean:
- “We couldn’t create a new partition”: Often caused by leftover partition data from a previous OS or NAS/RAID configuration on the drive.
- “Windows cannot be installed to this disk. The selected disk is of the GPT partition style”: Your BIOS is set to Legacy/CSM boot mode instead of UEFI, which conflicts with a GPT-formatted drive. Switch your boot mode to UEFI in BIOS.
- Drive shows as one giant “unallocated space” block: This is actually normal for a brand new drive and just needs a partition created during setup.
If the drive has old partitions causing conflicts, you can delete them directly in the Windows installer’s custom install screen, then let Windows auto-create the new partitions on the resulting unallocated space.
Before you delete any partitions or run a clean command in diskpart, make absolutely sure you’ve selected the correct drive. Deleting partitions is destructive and will permanently erase any data on that drive, and it’s shockingly easy to pick the wrong disk number when you’ve got multiple drives connected. Double check the drive size listed in the installer against what you expect your NVMe drive’s capacity to be before confirming anything.
Fix #4: Physical Connection and Slot Conflicts
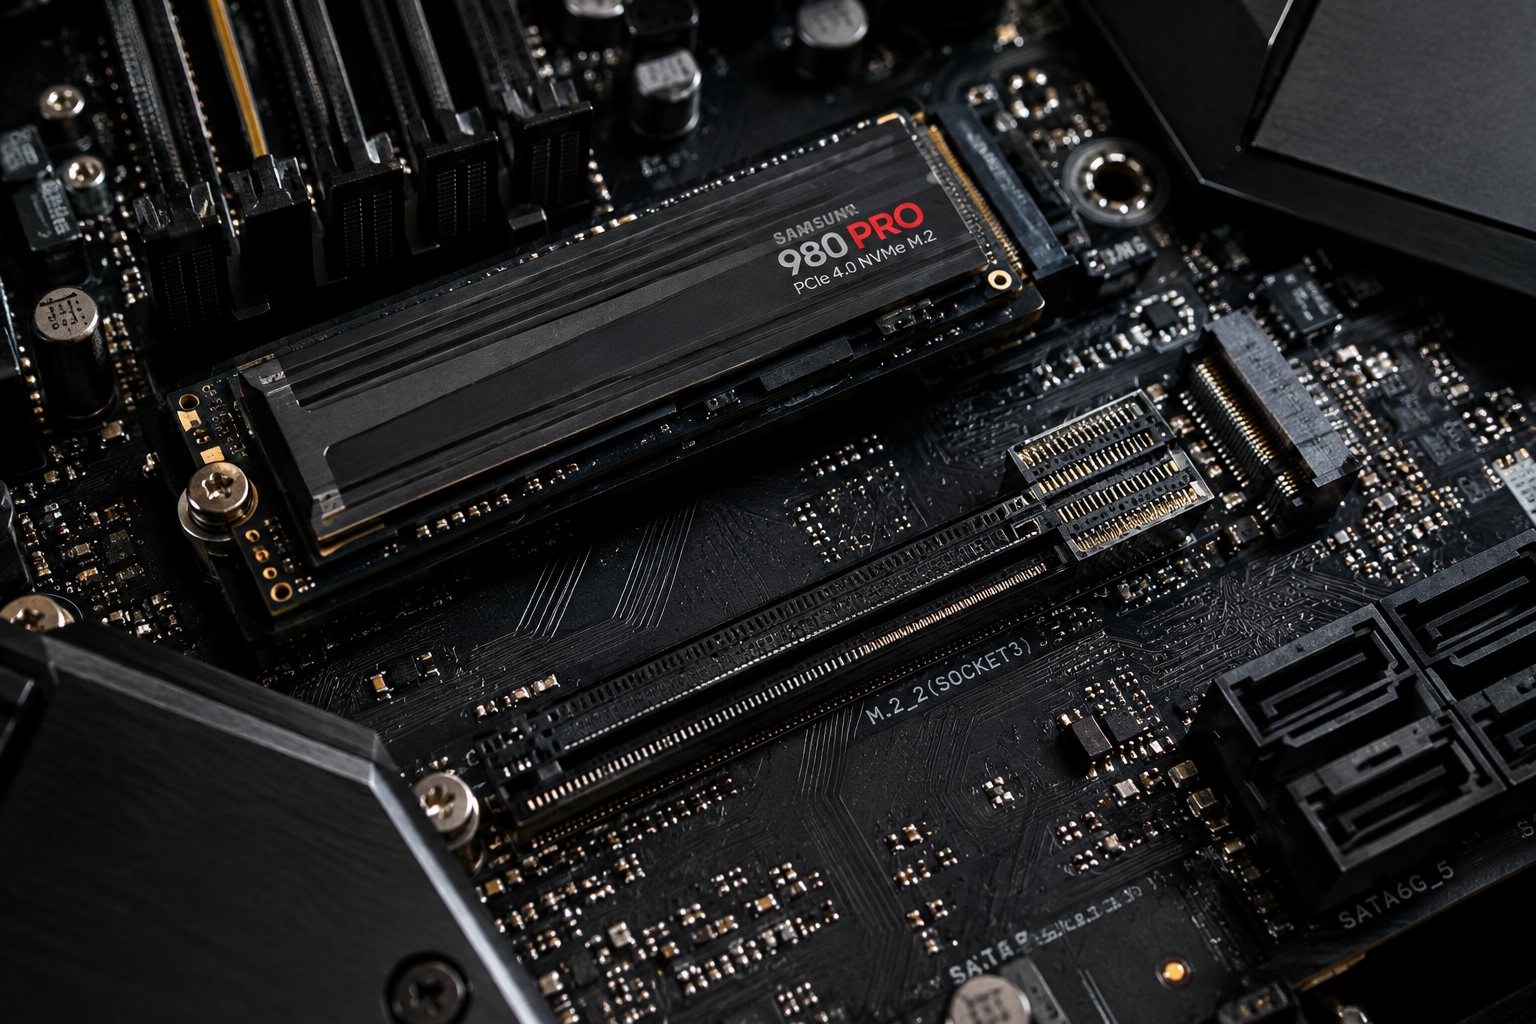
If you’ve tried the driver and mode fixes above and the drive still won’t show up properly, it’s time to rule out a hardware or slot issue. NVMe drives are more particular about their physical setup than people expect.
- M.2 slot sharing: Many motherboards disable a SATA port or a second M.2 slot when you populate a specific M.2 slot. Check your motherboard manual for a slot-sharing diagram.
- PCIe lane conflicts: Installing an NVMe drive in a specific slot can sometimes disable a PCIe x16 slot or drop it to x8, though this usually doesn’t affect the drive’s visibility itself.
- Reseat the drive: Power down, remove the drive, check the connector for debris or damage, and firmly reseat it. NVMe drives that aren’t fully clicked into place can appear intermittently in BIOS.
- Try a different M.2 slot: If your motherboard has more than one, moving the drive can rule out a faulty slot or a chipset-specific driver quirk.
If you’re troubleshooting this on a laptop rather than a desktop, the process looks a bit different since you’re often limited to a single slot with no alternatives to test. Guides like how to upgrade SSD on Dell XPS 15 or how to upgrade SSD on a Lenovo laptop can help confirm you’ve seated the drive correctly for your specific model.
When the Drive Isn’t the Problem
Occasionally the real issue isn’t the NVMe drive at all, it’s the installation media. A corrupted or improperly created Windows USB installer can behave strangely and fail to detect any drives correctly, NVMe or otherwise. Try recreating your bootable USB with the official Media Creation Tool and test again before assuming the drive itself is at fault.
It’s also worth confirming the drive is genuinely healthy. If you have access to another PC, connect the NVMe drive using an external enclosure and check whether it’s recognized properly and passes a basic health check in a tool like CrystalDiskInfo. If you’re shopping for an enclosure for this kind of testing, make sure it explicitly supports NVMe protocol and not just M.2 SATA, since the two are not interchangeable despite looking identical.
Frequently Asked Questions
Why does my NVMe SSD show in BIOS but not in Disk Management?
This usually means Windows is loaded and running, but the drive controller driver isn’t installed, or the drive genuinely has no partitions and Disk Management just isn’t displaying it prominently. Open Disk Management directly (Windows key + X, then Disk Management) and look for it listed as “Not Initialized.” If it’s not there at all, check Device Manager for an unknown device with a driver warning icon.
Do I need to install a driver for every NVMe SSD?
No. Most modern NVMe drives work with Windows’ built-in generic NVMe driver with zero extra installation needed. Driver issues almost always come from the motherboard’s RAID/VMD controller mode, not the drive itself, so the fix targets your BIOS storage configuration rather than the SSD.
Is it safe to switch my BIOS from RAID to AHCI after Windows is already installed?
Not without preparation. If you switch modes after an OS is already installed on that controller, Windows will typically fail to boot with a blue screen because it loaded drivers for the old mode. There are registry workarounds to prepare Windows for the switch beforehand, but if you’re doing a fresh install, it’s much simpler to just pick the correct mode before you start installing.

James Kennedy is a writer and product researcher at Drives Hero with a background in IT administration and consulting. He has hands-on experience with storage, networking, and system performance, and regularly improves and optimizes his home networking setup.