How to Upgrade Ssd on Lenovo Laptop? 10 Steps!
Upgrading your Lenovo laptop with a solid-state drive (SSD) can significantly boost its performance, giving you faster boot times and more responsive applications.
We’ll walk you through the steps to replace your current SSD with a new one, allowing you to boost your laptop’s storage capacity and performance.
Whether you’re looking to increase storage space for your files or upgrade to a faster SSD for quicker system responsiveness, we’ve got you covered.
Key Takeaway
Upgrading SSD on Lenovo Laptop: Step-by-Step Guide
Step 1: Determine Compatibility
Ensure the new SSD is compatible with your Lenovo laptop model by checking the specifications or consulting Lenovo’s support website.
Step 2: Backup Your Data
Before starting the upgrade process, back up all your important files and data to an external storage device or cloud storage service.
Step 3: Shut Down and Disconnect
Turn off your Lenovo laptop and disconnect all cables, including the power adapter. Place the laptop on a clean, flat surface with ample lighting.
Step 4: Remove the Old SSD
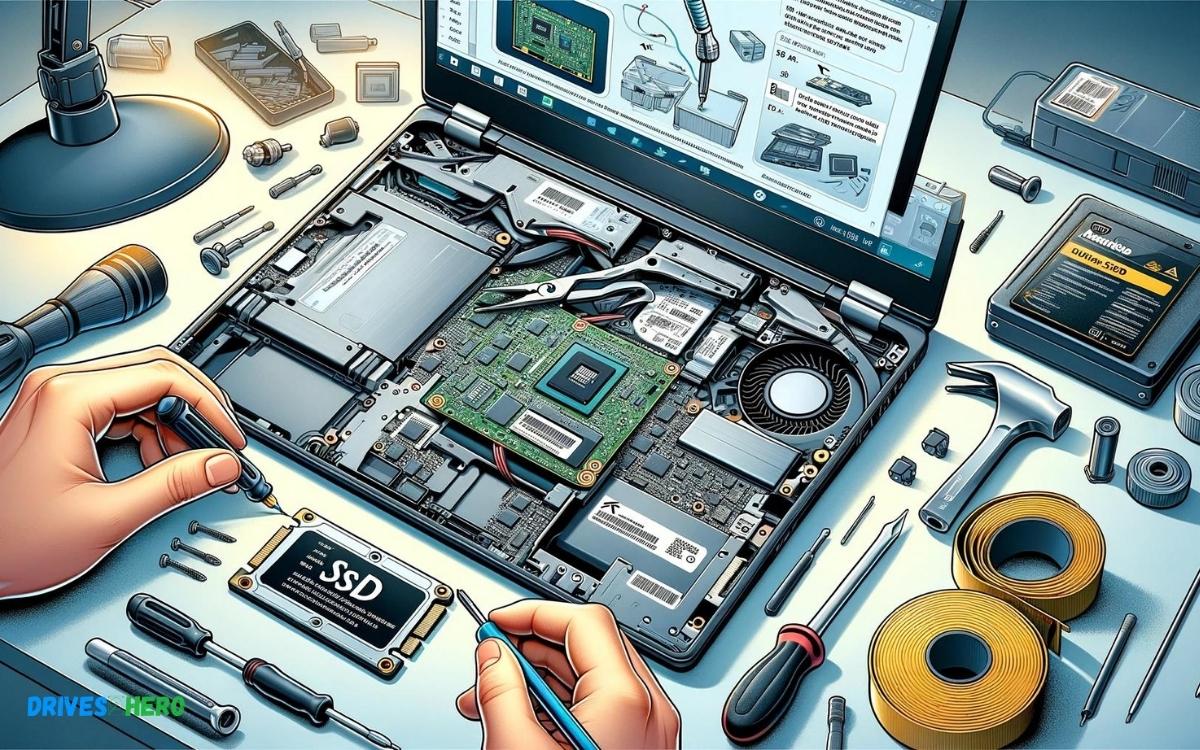
Locate the existing SSD compartment on your Lenovo laptop. Use a small Phillips screwdriver to remove the screws securing the SSD cover. Carefully lift the cover and set it aside.
Step 5: Disconnect and Remove Old SSD
Gently disconnect any cables or connectors attached to the old SSD. Slide the old SSD out of its slot, taking care not to damage any components.
Step 6: Install the New SSD
Carefully insert the new SSD into the slot previously occupied by the old one. Ensure it is properly aligned and firmly seated in place.
Step 7: Reconnect Cables
Reconnect any cables or connectors that were attached to the old SSD, ensuring they are securely plugged in.
Step 8: Replace SSD Cover
Carefully place the SSD cover back over the compartment and secure it with the screws you removed earlier.
Step 9: Power On and Verify
Power on your Lenovo laptop and ensure it boots up properly. Verify that the new SSD is recognized by the system by checking the device’s storage settings.
Step 10: Restore Data
Transfer your backed-up data from the external storage device back to your Lenovo laptop’s new SSD.
By following the step-by-step guide provided, you can seamlessly replace the old SSD with a new one without encountering major difficulties.
With the new SSD installed, you’ll experience faster boot times, quicker application loading, and enhanced overall responsiveness, enhancing your productivity and enjoyment of your Lenovo laptop.
Introduction To Upgrading SSD on A Lenovo Laptop
Upgrading the storage on your Lenovo laptop by replacing the old HDD (Hard Disk Drive) with a new SSD (Solid State Drive) is a powerful way to boost performance.
Traditional HDDs are mechanical and can lag in read/write speeds, while SSDs offer lightning-fast data access and better overall responsiveness.
An SSD upgrade is often the most effective way to rejuvenate an older Lenovo laptop or enhance the capabilities of a new one.
Understanding The Benefits Of SSD over HDD
- Faster Boot Times: SSDs can dramatically reduce the time it takes for your laptop to boot up.
- Improved Data Transfer Speeds: Experience quick file transfers and reduced load times for applications.
- Enhanced Durability: Without moving parts, SSDs are more resistant to shocks and bumps.
- Quieter Operation: SSDs operate silently, providing a quieter working environment.
- Energy Efficiency: SSDs consume less power, which can help improve battery life on laptops.
Compatibility And Preparation: Ensuring Your Lenovo Model Supports An Upgrade
- Before proceeding with the upgrade, it’s crucial to ensure that your Lenovo laptop model is compatible with SSDs.
- Start by consulting your laptop’s manual or the Lenovo support website for specifications and upgrade options.
- You’ll need to identify the form factor (2.5-inch or M.2), the interface (SATA or NVMe), and the maximum supported capacity to select the right SSD for your laptop.
Once compatibility is confirmed, the preparation stage includes backing up important data, gathering the necessary tools such as a screwdriver and an anti-static wrist strap, and acquiring the SSD that fits your performance and storage needs.
Keep your operating system’s recovery media at hand if a fresh installation is required after the upgrade.
| Preparation Step | Description |
|---|---|
| Check Compatibility | Verify SSD type and capacity supported by your Lenovo laptop. |
| Backup Data | Ensure all important files are backed up to avoid data loss. |
| Assemble Tools | Gather a suitable screwdriver and an anti-static wrist strap. |
| Purchase SSD | Select an SSD that meets your performance criteria and storage requirements. |
| Prepare OS Recovery Media | Create or have recovery media ready for your operating system, if necessary. |
Choosing The Right SSD for Your Lenovo Laptop
Upgrading the SSD in your Lenovo laptop can significantly enhance performance, offering faster boot times, snappier application launches, and more robust data transfer.
Selecting the perfect SSD, however, requires understanding the key specifications that align with your needs.
Ssd Specifications: Capacity, Type, And Size
When upgrading your Lenovo laptop with a new SSD, consider these fundamental specifications:
- Capacity: Reflects the storage space available. Common sizes range from 256GB to 2TB. Match the capacity to your usage needs more for gaming and heavy multimedia, less for general computing.
- Type: SSDs come mainly in two types SATA and NVMe. NVMe drives offer superior speed but ensure your Lenovo laptop has a compatible M.2 slot.
- Size: Form factors include 2.5 inches for SATA and M.2 for NVMe. Identify your laptop’s compatible form factor to ensure a proper fit.
Brand And Price: Balancing Quality And Cost
Navigating through brands and prices is critical:
| Brand | Key Features | Price Range |
|---|---|---|
| Samsung | Reliability, High Performance | Premium |
| Crucial | Excellent Value, Consistency | Mid-range |
| Kingston | Cost-efficient, Good Performance | Entry-level to Mid-range |
Research for brands offering the perfect mix of reliability, performance, and warranty without overshooting your budget. Higher-priced SSDs often provide better performance, but mid-range offerings can represent significant value.
Where To Buy: Retail Options And Online Marketplaces
Discovering the right place to purchase your SSD involves both convenience and cost-effectiveness:
- Local Electronics Stores: For hands-on advice and immediate purchase.
- Authorized Lenovo Retailers: To ensure compatibility and receive brand-specific guidance.
- Online Marketplaces: Such as Amazon, Newegg, or Best Buy’s website, often provide wider selections and competitive prices.
Purchasing from reputable sources ensures authenticity and warranty protection. Always look out for secure payment options and return policies
Post-installation: Optimizing Laptop Performance
Once you’ve successfully upgraded your Lenovo laptop with a shiny new SSD, it’s not just about hardware swap-outs. Enhancing performance involves smart setup maneuvers.
From software installations to system configurations, your machine is on the verge of transforming into a swifter, more reliable companion.
Dial in your settings with these critical post-installation steps to ensure you’re getting the most out of your SSD upgrade.
Operating System Migration: Clean Install Vs Cloning
Choosing the right approach to operating system (OS) migration is imperative. Deciding between a clean install and cloning could mean the difference between pure performance and unnecessary clutter.
- Clean Install: By starting fresh, a clean OS install ensures no leftover files from your previous drive will slow down your new SSD. This option is perfect for those who want a completely new start, guaranteeing a pristine operating system environment on their Lenovo laptop.
- Cloning: Cloning is a quick way to copy your existing setup onto the new SSD. This method saves time and retains all your current software and settings but be mindful of potentially transferring unwanted files or programs that could impact speed.
Driver Updates And System Configuration
Your upgraded Lenovo laptop may require new drivers to take full advantage of the SSD’s capabilities. Regular checks and updates to your laptop’s drivers ensure optimal communication between the operating system and hardware components.
- Visit Lenovo’s official support website.
- Locate the latest SSD drivers.
- Download and install for enhanced performance.
After driver updates, tweak your system settings to improve startup times and overall laptop responsiveness. Adjust power settings to ‘High Performance’ and ensure AHCI mode is enabled in BIOS for the best SSD performance.
Maintaining Your New SSD: Best Practices
Sustaining SSD health long-term is key to maintaining quick, reliable performance on your Lenovo laptop.
Implement these best practices:
| Action | Benefit |
|---|---|
| Regularly update the firmware. | Enhances stability and performance. |
| Keep your SSD at least 25% empty. | Prevents decreased speeds and wear. |
| Avoid unnecessary write operations. | Extends the lifespan of your SSD. |
| Enable TRIM command. | Allows the OS to inform the SSD which blocks of data are no longer in use and can be wiped internally. |
Regular monitoring and optimization of your laptop’s performance translate to a smoother, faster computing experience. Embrace these best practices to unleash the full potential of your laptop’s hardware investment.
Troubleshooting Common Ssd Upgrade Issues
Encountering issues after an SSD upgrade on a Lenovo laptop can be frustrating, but most problems have straightforward solutions.
Whether it’s boot hiccups or data transfer mishaps, a systematic approach to troubleshooting common SSD upgrade issues can help get your Lenovo laptop back on track.
Diagnosing And Fixing Boot Problems
After upgrading your Lenovo laptop with a new SSD, boot problems can surface. They might manifest as error messages, an eternal startup loop, or simply a black screen. Start by ensuring that the SSD is properly seated in the connection port.
Next, check the BIOS settings:
- Restart the laptop and enter the BIOS Setup (usually by pressing F1, F2, or the ‘Delete’ key during startup).
- Locate the ‘Boot’ or ‘Startup’ tab and verify that the new SSD is listed as the primary boot device.
- If not, adjust the boot order so that the SSD is the top choice.
- Save changes and exit the BIOS setup.
If the issue persists, consider booting from a recovery drive or installation media to repair the boot sector or reinstall the operating system.
Resolving Data Transfer Errors
Problems can also occur during the data transfer phase from your old storage to the new SSD. Errors might arise from corrupted files, connection issues, or incompatible data formats.
To tackle these errors, follow these steps:
- Double-check all cable connections between the SSD and your laptop or external enclosure if used.
- Employ reliable data cloning software for the transfer process and make sure it’s compatible with your SSD and operating system version.
- Run a disk check on the old drive to ensure there are no faulty sectors or corrupted files before attempting to clone again.
Remember, the best offense is a good defense: ensure your data is backed up before starting the upgrade process.
Contacting Lenovo Support For Further Assistance
If the above steps do not resolve the issues you’re facing, it’s time to seek additional assistance.
Lenovo Support offers a variety of resources:
| Resource Type | Description |
|---|---|
| User Manuals | Detailed guides for troubleshooting and hardware specifics for your particular Lenovo model. |
| Online Community Forums | Connect with other Lenovo users who might have experienced similar issues and found solutions. |
| Customer Service | Professional support from Lenovo’s technical assistance team via phone, email, or live chat. |
Reaching out to Lenovo Support can provide the expertise needed to handle more complex or model-specific SSD upgrade issues effectively.
Future Considerations
Exploring the final thoughts on upgrading a Lenovo laptop’s SSD revolves around the potential leap in performance and what this means for future enhancements.
It’s crucial to recognize the long-term effects, including the possibilities it opens up for further improvements and the responsible handling of the old hardware.
The Impact Of Ssd Upgrade On Overall Laptop Performance
Implementing an SSD not only brings a new burst of life into your Lenovo laptop but also marks a significant leap in performance.
The benefits are immediately noticeable, with improvements such as:
- Lightning-fast boot times ensuring your device is up and running within seconds.
- Quicker file access speeds which streamline workload management and multitasking.
- Enhanced reliability, with SSDs having no moving parts, reducing the risk of mechanical failures.
- Improved battery life from the efficiency of an SSD’s power consumption.
This upgrade isn’t just a stop-gap; it’s a significant jump towards keeping your Lenovo competitive and capable of handling modern applications with ease.
Considering Future Upgrades: What’s Next After Ssd?
Once the SSD is in place, it’s natural to look at what other upgrades can complement this new performance ceiling.
Prospective enhancements could include:
- Memory Upgrade: Increasing the RAM can further enhance multitasking capabilities and speed.
- Processor Overhaul: Considering a CPU upgrade—if your model allows it—could further modernize your machine.
- Improved Cooling Solutions: High-performing components can generate more heat, making an efficient cooling system crucial.
Future-proofing your device is about a balance of compatible upgrades that work in harmony to extend the lifespan and functionality of your laptop.
Recycling The Old Drive: Eco-friendly Disposal Tips
Post-upgrade, the old hard drive need not turn into waste.
Take the following steps to ensure responsible disposal:
| Action | Benefit |
|---|---|
| Use as External Storage | Repurpose the drive with an external enclosure for portable storage. |
| Data Wiping | Ensure all personal information is securely erased before disposal. |
| E-Waste Recycling | Utilize certified e-waste centers to prevent harmful environmental impacts. |
Besides these options, consider donating the drive to educational initiatives that refurbish technology for learning purposes. It’s a sustainable choice that contributes to both societal benefits and environmental preservation.
Conclusion
Upgrading your Lenovo laptop with a new SSD can breathe new life into your device. Short, concise steps ensure a hassle-free installation.
Embrace the speed and reliability that comes with your laptop’s revitalization. Dive into enhanced productivity with your newly upgraded Lenovo.

Harold Williams is a senior writer and technical editor at Drives Hero with 20+ years of experience in IT administration. He specializes in storage systems, SSD reviews, and performance testing, bringing real-world insight to every guide.