How to Build a Fast Editing Workflow with SSD RAID
If you’ve ever watched a progress bar crawl across your screen while scrubbing through 4K or 8K footage, you already know that a single SSD isn’t always enough. Video editing demands sustained, high-throughput storage, and when your timeline stutters or your exports drag, the bottleneck is almost always your drive. Building an SSD RAID array can multiply your read and write speeds, turning your editing workstation into something that actually keeps pace with modern codecs and high-resolution media.
This guide walks you through setting up an SSD RAID optimized for editing speed, covering the RAID levels that matter, software versus hardware RAID options, and specific enclosures worth your money. Whether you’re cutting corporate promos or feature-length films, this is how you stop waiting on your storage.
Why RAID 0 Is the Video Editor’s Best Friend
RAID 0 stripes data across two or more drives, effectively combining their speeds. Two SATA SSDs in RAID 0 can deliver sequential read speeds well above 1,000 MB/s. With NVMe drives, you can push into the 5,000+ MB/s range depending on the interface. For video editing, where you’re constantly reading large files sequentially, this is exactly the performance profile you need.
The tradeoff is zero redundancy. If one drive in a RAID 0 array fails, you lose everything on both drives. For a scratch disk or active editing volume, this is an acceptable risk, because your raw footage should live on a separate backup. If you’re unfamiliar with the differences between striping and mirroring, our RAID 0 vs RAID 1 comparison breaks it down in detail.
RAID 10 (a mirror of stripes) gives you both speed and redundancy, but it requires four drives minimum and cuts your usable capacity in half. For dedicated editing workflows where the media is backed up elsewhere, RAID 0 gives you the most performance per dollar.
Software RAID vs. Hardware RAID: Which Should You Use?
This is where a lot of editors get tripped up. Both approaches work, but they have very different strengths.
Software RAID
Software RAID uses your operating system to manage the array. On macOS, you can create a RAID 0 set through Disk Utility. On Windows, Storage Spaces or the built-in Disk Management tool handles it. Linux users have mdadm, which is incredibly flexible.
The advantages: it’s free, it requires no special hardware, and modern CPUs handle the RAID calculations with negligible overhead. For two to four SATA SSDs, software RAID is perfectly capable. The main downside is that your array is tied to that specific OS installation. Moving the array to another machine can be complicated or impossible without rebuilding.
Hardware RAID
Hardware RAID uses a dedicated controller, either a PCIe card inside your workstation or a controller built into an external enclosure. The array is managed independently of your OS, which means it shows up as a single volume. You can move it between machines, and the controller handles all parity and striping calculations.
For NVMe SSD RAID arrays, hardware controllers are especially useful because they prevent thermal throttling through active cooling and dedicated processing. If you’ve noticed your SSDs slowing down over time, sustained writes in a poorly ventilated software RAID can make the problem worse. A good hardware enclosure with active cooling solves this.
My recommendation: If you’re building an internal RAID with two SATA SSDs, software RAID is fine. If you want a portable or external multi-drive NVMe setup, go with a hardware RAID enclosure. The convenience and thermal management are worth it.
Choosing the Right SSDs for Your RAID Array
Not all SSDs are created equal for RAID use. You want drives with consistent sustained write speeds, good thermal performance, and high endurance (TBW ratings). Video editing involves writing enormous files repeatedly, so consumer-grade drives with aggressive thermal throttling will let you down.
For SATA RAID 0 setups, the Samsung 870 EVO remains one of the best options. It delivers consistent sequential performance and has excellent endurance for a SATA drive. Pair two of them in RAID 0 and you’ll get roughly 1,100 MB/s sequential reads, which is more than enough for 4K ProRes or DNxHR editing.
For NVMe builds, the Samsung 990 Pro is hard to beat. We’ve covered this drive extensively in our Samsung 990 Pro review, and its sustained write performance is among the best in the Gen 4 class. Two of these in RAID 0 on a Thunderbolt enclosure will handle 8K RED RAW without breaking a sweat.
When deciding on capacity, keep in mind that your RAID volume should hold your active project files, not your entire media library. A pair of 1TB or 2TB drives usually provides the right balance of speed and space. For long-term storage and archiving, a NAS is a better fit. You can learn more about that approach in our guide to cloud backup versus local NAS solutions.
Recommended SSD RAID Enclosures for Video Editors
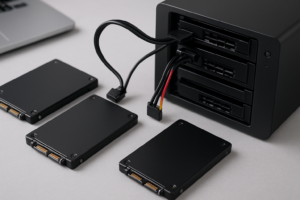
External RAID enclosures are the most popular choice for video editors because they’re portable, self-contained, and don’t require cracking open your workstation. Here are the enclosures I’d point you toward.
OWC ThunderBay 4 Mini
The OWC ThunderBay 4 Mini holds four M.2 NVMe drives and connects via Thunderbolt 3 (compatible with Thunderbolt 4). It includes a built-in hardware RAID controller supporting RAID 0, 1, 4, 5, and 10. With four NVMe SSDs in RAID 0, you can exceed 2,800 MB/s sustained throughput. The enclosure includes active cooling with a near-silent fan, which is critical for preventing thermal throttling during long export sessions. It works beautifully with both Mac and PC.

OWC ThunderBay 4 Mini Thunderbolt 3 NVMe Enclosure
Four-bay NVMe enclosure with hardware RAID and Thunderbolt 3, ideal for high-speed video editing workflows.
Sabrent Thunderbolt 3 Dual NVMe Dock
If you only need two drives, the Sabrent Thunderbolt 3 Dual NVMe Dock is a more compact and affordable option. It supports two M.2 NVMe drives and offers hardware RAID 0 and RAID 1. You won’t hit the same speeds as a four-bay enclosure, but a two-drive NVMe RAID 0 through Thunderbolt 3 can still deliver over 2,000 MB/s, which is excellent for 4K and 6K workflows.
Acasis Thunderbolt 4 NVMe RAID Enclosure
For editors on the latest Thunderbolt 4 hardware, the Acasis Thunderbolt 4 NVMe RAID enclosure is worth a look. It supports up to four NVMe drives and takes advantage of the increased bandwidth and daisy-chaining capabilities of Thunderbolt 4. It’s a strong choice if you’re building a setup around a newer MacBook Pro or a Thunderbolt 4 equipped PC workstation.
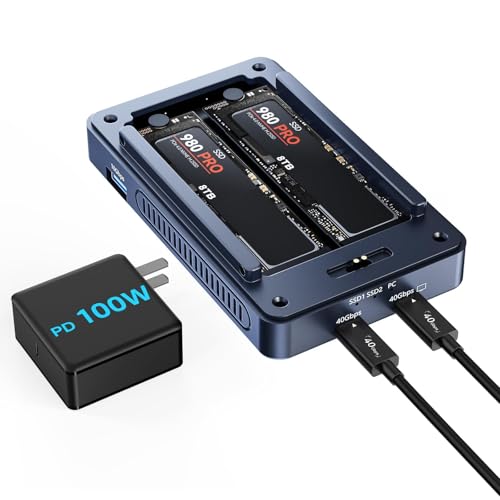
Acasis Thunderbolt 4 NVMe RAID Enclosure
Four-bay NVMe enclosure with Thunderbolt 4 support, great for editors using the latest Mac or PC hardware.
If you’re a Mac user considering external storage options more broadly, our roundup of the best external drives for Mac covers both single-drive and multi-drive options.
Setting Up Your SSD RAID: Practical Tips
Once you’ve got your enclosure and drives, here are a few things that will save you headaches.
- Use identical drives. Mixing different SSD models or capacities in a RAID 0 array means the array’s performance is limited by the slowest drive. Buy matching drives from the same batch if possible.
- Format for your editing software. If you’re on macOS using Final Cut Pro or DaVinci Resolve, format as APFS or HFS+. For cross-platform work, exFAT works but lacks journaling. On Windows with Premiere Pro, NTFS is your best bet.
- Don’t use your RAID array as your only copy. RAID 0 is not a backup. Keep your raw media on a separate drive or NAS, and use your RAID volume as a fast working drive. Setting up automated backups to a NAS is one of the smartest things you can do alongside a RAID 0 editing setup.
- Enable TRIM if using software RAID. TRIM keeps your SSDs performing well over time by properly managing deleted data blocks. Most hardware RAID enclosures handle this automatically, but software RAID configurations on Windows and macOS sometimes need manual verification.
- Monitor drive health. Use tools like CrystalDiskInfo (Windows) or DriveDx (Mac) to keep tabs on your SSDs’ health. When one drive in a RAID 0 starts showing signs of wear, replace both drives and rebuild the array rather than waiting for a failure.
Frequently Asked Questions
Is RAID 0 safe enough for video editing work?
RAID 0 is safe for editing, but not for storage. Your RAID 0 volume should be your fast working drive, where you keep active project files and timelines. Raw footage and final exports should always be backed up to a separate location, whether that’s a NAS, a second drive, or cloud storage. If one SSD fails in a RAID 0, all data on the array is lost. Treat it as a performance tool, not an archive.
Can I build an SSD RAID using USB instead of Thunderbolt?
Technically yes, but USB introduces a significant bandwidth bottleneck. USB 3.2
James Kennedy is a writer and product researcher at Drives Hero with a background in IT administration and consulting. He has hands-on experience with storage, networking, and system performance, and regularly improves and optimizes his home networking setup.