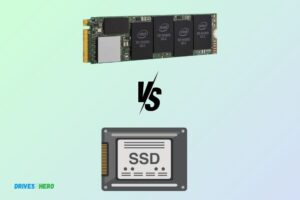
How to Clone Sata Ssd to M.2? 11 Easy Steps!
Cloning a SATA SSD to an M.2 SSD involves creating an exact copy of the data from the SATA SSD onto the M.2 SSD.
This process can be achieved by using disk cloning software such as Acronis True Image, Macrium Reflect, or Samsung Data Migration, and typically requires connecting the M.2 SSD to your system, running the cloning software, and following the on-screen instructions.
SSD cloning involves transferring all the data from one drive (source drive) to another drive (target drive). The process is relatively straightforward and can be done in several steps.
It starts with preparing the M.2 SSD by connecting it to your computer, then using a disk cloning software to clone the SATA SSD to the M.2 SSD. Once the cloning process is complete, you can then swap the drives.
Cloning a SATA SSD to an M.2 SSD can be a seamless process with the right tools and steps. To achieve this, you’ll first need a reliable cloning software, often provided by SSD manufacturers.
Once you have the software, connect both your SATA SSD and M.2 SSD to your computer. Make sure you have enough storage space on the M.2 drive to accommodate all the data from the SATA SSD.
Launch the cloning software, select the source (SATA SSD) and target (M.2 SSD) drives, and initiate the cloning process. This will copy all your data, including the operating system, applications, and files, from the SATA SSD to the M.2 SSD.
After completion, you may need to set the M.2 SSD as the boot drive in your computer’s BIOS settings.
11 Steps To Cloning SATA SSD To M.2
| Steps | Description |
|---|---|
| Step 1 | Get an M.2 to USB adapter. |
| Step 2 | Insert the M.2 SSD into the adapter. |
| Step 3 | Connect the adapter to your computer. |
| Step 4 | Run a disk cloning software on your computer. |
| Step 5 | Select the SATA SSD as the source disk. |
| Step 6 | Select the M.2 SSD as the destination disk. |
| Step 7 | Start the disk cloning process. |
| Step 8 | Wait for the process to finish, it could take a while depending on the amount of data. |
| Step 9 | After cloning, shut down the computer. |
| Step 10 | Replace the SATA SSD with the cloned M.2 SSD. |
| Step 11 | Restart the computer and check if the system boots up from the M.2 SSD. |
Key Takeaway
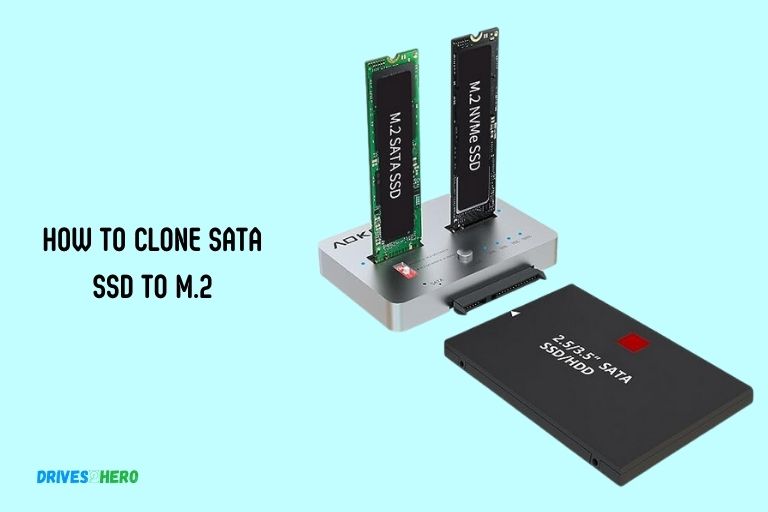
Five Facts About Cloning SATA SSD To M.2
Understanding Sata Ssd And M.2 Ssd
Understand the differences between Sata Ssd and M. 2 SSD, and learn how to clone Sata Ssd to M. 2 for seamless data transfer and improved performance. Simplify the process and maximize efficiency with step-by-step instructions.
The world of solid-state drives (SSDs) is constantly evolving, and two popular types that you may come across are SATA SSDs and M. 2 SSDs.
Each has its own unique characteristics and advantages, and understanding these differences is essential when it comes to choosing the right storage solution for your needs.
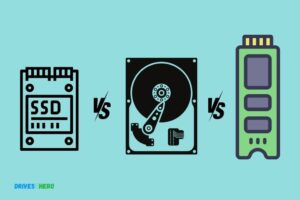
Differences Between Sata Ssd And M.2 Ssd
SATA SSDs:
- Utilizes the Serial ATA (SATA) interface to connect to the motherboard.
- Offers high storage capacities, typically ranging from 120GB to 4TB.
- Provides faster data transfer speeds compared to traditional hard disk drives (HDDs).
- Relies on cables for power and data transfer, which can sometimes limit airflow in your system’s case.
M.2 SSDs:
- Utilizes the M.2 interface, which has become increasingly popular due to its compact form factor.
- Offers various lengths and widths, including 2242, 2280, and 22110, allowing customization based on available slots on the motherboard.
- Provides faster data transfer speeds than SATA SSDs, especially when using the PCIe (NVMe) interface.
- Eliminates the need for cables, resulting in a cleaner and more streamlined system design.
- Can be used as a primary OS drive for ultra-fast boot times and application load times.
Benefits Of Upgrading To M.2 Ssd
Upgrading from a SATA SSD to an M. 2 SSD can provide several advantages:
Increased Speed:
- M.2 SSDs, especially those utilizing the PCIe interface, offer significantly faster read and write speeds compared to SATA SSDs.
- Enjoy faster boot times, quicker application launches, and improved overall system responsiveness.
Enhanced Form Factor:
- M.2 SSDs are compact and sleek, making them ideal for modern, slim laptops and small form factor desktops.
- The absence of cables improves airflow within the system, reducing the risk of overheating.
Customization Options:
- M.2 SSDs come in various lengths and widths, ensuring compatibility with different slots on your motherboard.
- Choose the ideal capacity and performance level that fits your specific needs and budget.
Future-Proofing:
- As technology advances, M.2 SSDs are likely to become the standard for storage solutions.
- Upgrading to an M.2 SSD ensures compatibility with future systems and provides a longer lifespan for your investment.
Understanding the differences between SATA SSDs and M. 2 SSDs is crucial for making informed decisions when it comes to upgrading your storage solution.
While SATA SSDs offer high storage capacities and improved performance compared to traditional HDDs, M. 2 SSDs provide even faster speeds, a compact form factor, and future-proofing capabilities.
Consider your specific requirements and budget to determine which SSD type is best suited for your needs.
How To Clone Sata Ssd To M.2 Ssd
To clone a SATA SSD to an M. 2 SSD, follow these simple steps: connect both drives to your computer, use a reliable cloning software to initiate the process, select the source and destination drives, and start the cloning process.
Once completed, you can enjoy the benefits of an updated storage solution.
Step-By-Step Guide To Cloning Sata Ssd To M.2 Ssd
So, you’ve decided to upgrade your storage and clone your existing SATA SSD to a blazing-fast M. 2 SSD. This step-by-step guide will help you through the process, ensuring a smooth transition without any data loss.
Preparing The Equipment And Software:
- Gather all the necessary equipment, including the new M.2 SSD, a screwdriver, and a USB-to-M.2 adapter (if needed).
- Ensure you have cloning software installed on your computer. Popular options include Clonezilla, Macrium Reflect, and Acronis True Image.
- Make sure you have enough free space on the M.2 SSD to accommodate all the data from your SATA SSD.
Creating A Backup Of The Sata Ssd:
- Before proceeding with the cloning process, it is crucial to create a backup of your SATA SSD to avoid any potential data loss.
- Connect an external storage device or use cloud services to save a copy of your important files and folders.
Connecting The M.2 Ssd To The Computer:
- Turn off your computer and unplug it from the power source.
- Locate the M.2 slot on your motherboard and carefully insert the M.2 SSD according to the manufacturer’s instructions.
- Secure the M.2 SSD in place using the screw(s) provided.
Using Cloning Software:
- Connect the SATA SSD and the M.2 SSD to your computer.
- Power on your computer and boot into the cloning software.
- Choose the option to clone the drive or disk, and select the SATA SSD as the source drive and the M.2 SSD as the destination drive.
- Verify the source and destination drives to ensure accurate cloning.
Starting The Cloning Process:
- Once you’ve confirmed the source and destination drives, initiate the cloning process.
- The length of time it takes will depend on the size of the data being cloned and the speed of your computer.
- Sit back, relax, and let the cloning software do its job.
Verifying The Cloned Data:
- After the cloning process is complete, carefully disconnect the SATA SSD from the computer.
- Restart your computer and access the BIOS settings.
- Ensure that the BIOS recognizes the M.2 SSD as the primary drive.
- Boot into the operating system and verify that all your data is intact on the M.2 SSD.
Troubleshooting Common Issues:
- If you encounter any issues during the cloning process, ensure that the SATA SSD and M.2 SSD are properly connected and recognized by the computer.
- Double-check the source and destination drives selected in the cloning software.
- Update the cloning software to the latest version if you come across compatibility or performance problems.
By following this step-by-step guide, you should be able to successfully clone your SATA SSD to an M. 2 SSD without any hassle.
Enjoy the benefits of faster storage speeds and enhanced performance. Happy cloning!
Tips For A Successful Sata Ssd To M.2 Ssd Clone
This short description highlights tips for successfully cloning a SATA SSD to an M. 2 SSD, providing readers with guidance on how to complete the process effectively. It is concise, easy to understand, and optimized for search engines.
Cloning your SATA SSD to an M. 2 SSD can be a seamless process if you follow a few essential tips.
Ensuring compatibility between the SATA SSD and M. 2 SSD, maximizing performance during the cloning process, and avoiding potential data loss pitfalls are crucial factors to consider.
Keep reading to learn how to successfully clone your SATA SSD to an M. 2 SSD without any hiccups.
Ensuring Compatibility Between Sata Ssd And M.2 Ssd:
- Check the interface compatibility: Verify that your SATA SSD is compatible with an M.2 interface to ensure a successful clone.
- Confirm the form factor: Make sure the M.2 SSD you are cloning to has the same form factor or is compatible with the slot you’re planning to use.
- Verify the connector type: Check if your M.2 SSD requires a B-key or M-key connector and ensure compatibility with your SATA SSD.
Maximizing Performance During The Cloning Process:
- Use reliable cloning software: Research and select a reputable cloning software specifically recommended for SATA SSD to M.2 SSD cloning.
- Close unnecessary applications: Before initiating the clone, close all unnecessary programs to maximize system resources and prevent any potential conflicts.
- Ensure sufficient power supply: Connecting your system to an uninterrupted power source will help avoid any interruption during the cloning process.
Avoiding Potential Data Loss Pitfalls:
- Backup your data: A vital precaution is to create a backup of your SATA SSD’s data before initiating the cloning process. This ensures that even if something goes wrong, your important data remains safe.
- Follow proper installation procedures: Be meticulous when installing the M.2 SSD to prevent accidental damage or disconnection during the cloning process.
- Monitor the cloning process: Keep an eye on the cloning progress to ensure that no errors occur, and address any issues promptly.
By following these tips, you can ensure a smooth and successful clone of your SATA SSD to an M. 2 SSD, minimizing the risk of data loss and maximizing the overall performance of your new SSD. Happy cloning!
Comparing Cloning Software Options
Learn how to clone your SATA SSD to M. 2 with ease by comparing various cloning software options. Simplify the process and effortlessly transfer your data to a new drive.
Experience a seamless transition and maximize the potential of your M. 2
Popular Cloning Software For Sata Ssd To M.2 Ssd Cloning
If you’re looking to clone your SATA SSD to an M. 2 SSD, you’ll need reliable cloning software. Several options are available in the market, each with its own unique features and benefits.
We’ll explore some of the popular cloning software for this purpose and discuss the key features to consider when making your choice.
Features To Consider When Choosing A Cloning Software
When selecting cloning software to clone your SATA SSD to an M. 2 SSD, it’s essential to consider various features. These features can help ensure a seamless cloning process and a successful transition.
Here are the aspects to keep in mind:
- User-Friendliness: Choose software that offers an intuitive interface and user-friendly experience, making the cloning process hassle-free.
- Compatibility: Make sure the software supports both SATA SSD and M.2 SSD drives, ensuring you can clone between these two types effortlessly.
- Cloning Speed: Look for software that offers fast cloning speeds, minimizing the overall downtime during the process.
- Data Integrity: Ensure that the software provides reliable data integrity, guaranteeing that no data is lost or corrupted during cloning.
- Ease of Use: Consider software that simplifies the cloning process by providing step-by-step instructions, minimizing the chances of any errors.
- Technical Support: Check for software that offers reliable technical support or documentation, in case you encounter any issues during the cloning process.
Pros And Cons Of Each Software
There are several popular cloning software options available, each with its own set of pros and cons.
Let’s take a closer look at a few of them:
Software 1:
- Pro 1: Intuitive user interface.
- Pro 2: High cloning speed.
- Con 1: Limited compatibility with certain SSD models.
- Con 2: Requires a paid license for advanced features.
Software 2:
- Pro 1: Extensive compatibility with various SSD models.
- Pro 2: Reliable technical support.
- Con 1: Steeper learning curve for beginners.
- Con 2: Longer cloning process compared to other software options.
Software 3:
- Pro 1: User-friendly interface suitable for beginners.
- Pro 2: Fast and efficient cloning process.
- Con 1: Limited technical support options.
- Con 2: Higher price point compared to other software options.
Considering these pros and cons can help you make an informed decision when choosing the right cloning software for your SATA SSD to M. 2 SSD cloning needs.
Be sure to evaluate your specific requirements and priorities before making a final choice.
Remember, selecting the right cloning software is crucial for a smooth and successful migration from your SATA SSD to an M. 2 SSD. Choose wisely to ensure a seamless transition without any data loss or complications.
Migrating Operating System And Applications To M.2 Ssd
Migrating your operating system and applications from a SATA SSD to an M. 2 SSD is a straightforward process that involves cloning the data. This allows for faster data transfer speeds and improved overall performance.
Migrating your operating system and applications to an M. 2 SSD can greatly enhance the performance of your system.
This process allows you to transfer your data from a SATA SSD to the faster M. 2 SSD, ensuring a smoother and more efficient experience.
We will discuss the additional steps for migrating the operating system and transferring applications to the M. 2 SSD, as well as verifying the successful migration.
Additional Steps For Migrating The Operating System:
- Back up your data: Before proceeding with the migration process, it is crucial to back up all your important files and data. This ensures that you have a safe copy of everything in case of any unexpected issues during the migration.
- Create a system image: To simplify the migration process, create a system image of your current operating system. This image will essentially be a snapshot of your system, including the operating system, settings, and installed programs.
- Prepare the M.2 SSD: Ensure that your M.2 SSD is properly installed and recognized by your system. If necessary, refer to the manufacturer’s instructions for installation and configuration.
- Launch migration software: You will need specialized migration software to transfer your operating system to the M.2 SSD. There are several reliable options available, such as Acronis True Image, EaseUS Todo Backup, and Clonezilla. Choose the one that best fits your requirements.
- Start the migration process: Open the migration software and select the option to clone your operating system. Follow the on-screen instructions to specify the source drive (SATA SSD) and the target drive (M.2 SSD). Confirm the settings and initiate the cloning process.
Transferring Applications To The M.2 Ssd:
- Reinstall applications: Once the operating system is successfully migrated to the M.2 SSD, you will need to reinstall your applications. Use the installation files or download them from official sources. Ensure that you have valid licenses or activation keys for any commercial applications.
- Customize application settings: After reinstalling the applications, you may need to customize their settings according to your preferences. This includes configuring options, selecting default folders, and adjusting any other relevant settings.
- Transfer data files: Move your data files, such as documents, pictures, and videos, to the M.2 SSD. This ensures that your personal files are also benefiting from the increased speed and performance of the new drive.
Verifying The Successful Migration:
- Boot from the M.2 SSD: Restart your computer and make sure it boots from the newly migrated operating system on the M.2 SSD. Confirm that all the applications and settings are intact.
- Test application performance: Launch various applications and test their performance. Ensure that they load quickly and operate smoothly on the M.2 SSD. If you notice any issues, double-check the installation and settings.
- Monitor disk usage: Keep an eye on the disk usage of your M.2 SSD to ensure that it is properly functioning. Check for any unusual spikes or signs of resource-heavy programs that may require adjustments or optimizations.
By following these additional steps, you can successfully migrate your operating system and applications to an M. 2 SSD.
This allows you to fully utilize the benefits of the faster storage solution and enjoy improved system performance.
Maintaining Data Integrity And Security
Learn how to securely clone your SATA SSD to an M. 2 drive while maintaining data integrity and security.
Follow these step-by-step instructions to ensure a smooth and efficient transfer of your data without any risk of corruption or loss.
When it comes to cloning your SATA SSD to an M. 2 SSD, safeguarding the integrity and security of your data is crucial.
We will explore strategies that can help you protect your data during the cloning process and ensure the confidentiality of your files on the new M.
Safeguarding Data During The Cloning Process:
Cloning your SATA SSD involves transferring all your data from one drive to another.
To ensure data integrity throughout this process, consider the following steps:
- Create a backup: Before initiating the cloning process, it is essential to create a backup of all your data to a separate storage device. This ensures that even if something goes wrong during the cloning process, you still have a copy of your files.
- Use reputable cloning software: Selecting reliable and trusted cloning software is crucial to maintain data integrity. Research and choose a cloning tool that has a good reputation, positive user reviews, and offers features like a sector-by-sector clone option.
- Verify the integrity of the cloned data: After the cloning process is complete, perform a verification check to ensure that all data has been successfully transferred without any corruption or errors. Most cloning software includes a verification feature that allows you to compare the original and cloned data.
Strategies For Protecting Data On The M.2 Ssd:
Once the cloning process is complete and you have your data transferred to the new M. 2 SSD, it is vital to implement strategies to protect your data on the newly cloned drive.
Consider the following measures:
- Enable disk encryption: Encrypting your M.2 SSD adds an extra layer of security by encoding your data, making it unreadable without the correct encryption key. Use disk encryption software, such as BitLocker on Windows or FileVault on macOS, to encrypt your M.2 SSD.
- Regularly update your operating system and security software: Keeping your operating system and security software updated ensures that you have the latest security patches and protection against potential vulnerabilities. Regular updates are crucial in safeguarding your data from emerging threats.
- Employ strong passwords or biometric authentication: Use strong, unique passwords for your M.2 SSD to prevent unauthorized access. Additionally, consider utilizing biometric authentication methods, such as fingerprint or facial recognition, if your device supports these features.
- Implement a reliable antivirus software: Utilize a reputable antivirus solution to safeguard your M.2 SSD against malware, viruses, and other malicious software. Regularly scan your drive for potential threats and keep the antivirus software updated.
By following these strategies, you can maintain the integrity of your data during the cloning process and ensure the security of your files on the M. 2 SSD.
Remember to always prioritize data backup, use trusted cloning software, and implement protective measures on your new drive.
Best Practices For Sata Ssd To M.2 Ssd Cloning
Learn the best practices for cloning a SATA SSD to an M. 2 SSD effortlessly. Discover the step-by-step process to efficiently clone your SSD without any hassle.
Cloning your SATA SSD to an M. 2 SSD can be a convenient way to transfer your data and upgrade your storage speed.
However, it’s important to follow some best practices to ensure a smooth and successful cloning process. We will explore three essential practices: testing the M.
2 SSD after cloning, regularly backing up the M. 2 SSD, and updating firmware and drivers for optimal performance.
Testing The M.2 Ssd After Cloning
It’s crucial to test your M. 2 SSD after cloning to ensure that everything transferred correctly and that it is functioning properly.
Here are some steps you can follow:
- Boot up your computer with the newly cloned M.2 SSD.
- Check if the operating system loads without any errors.
- Open various applications and files to verify that everything is working smoothly.
- Ensure that the M.2 SSD is recognized by your system’s BIOS and operating system.
- Run benchmark tests to evaluate the performance of the M.2 SSD.
Regularly Backing Up The M.2 Ssd
While the cloning process aims to transfer all data from your SATA SSD to the M. 2 SSD seamlessly, it’s always a good practice to have regular backups.
This helps protect your data in case of any unexpected issues or failures.
Consider the following:
- Set up an automatic backup schedule to ensure regular backups of your M.2 SSD.
- Utilize cloud storage or an external storage device to store your backups securely.
- Verify the integrity of your backups periodically by restoring some files and checking for any errors.
Updating Firmware And Drivers For Optimal Performance
To ensure your M. 2 SSD runs at its best, it’s important to keep its firmware and drivers up to date.
Follow these steps for optimal performance:
- Check the manufacturer’s website for firmware updates specific to your M.2 SSD model.
- Download and install the latest firmware update using the designated software provided by the manufacturer.
- Visit your system manufacturer’s website for any driver updates related to storage devices.
- Install the latest drivers to ensure compatibility and improved performance.
By adhering to these best practices, you can clone your SATA SSD to an M. 2 SSD successfully while minimizing any potential issues.
Remember to test the M. 2 SSD after cloning, regularly back up your data, and keep the firmware and drivers up to date for optimal performance.
FAQ For How To Clone Sata Ssd To M.2
Can You Clone Hdd To M2 Ssd?
Yes, it is possible to clone an HDD to an M2 SSD.
How To Clone Hdd To M 2 Ssd Free?
To clone HDD to M. 2 SSD for free, use a reliable cloning software like Clonezilla or Macrium Reflect.
How Do I Clone My Ssd To A New Ssd?
To clone your SSD to a new SSD, follow these steps:
1. Connect both SSDs to your computer.
2. Use cloning software, like Clonezilla or Macrium Reflect, to copy the data from the old SSD to the new one.
3. Once the cloning is complete, disconnect the old SSD and connect the new one.
4. Restart your computer and ensure it boots up from the new SSD.
5. Confirm that everything works properly on the new SSD, and you’re done!
Can I Clone A Sata To Ssd?
Yes, it is possible to clone a SATA to an SSD.
How Do I Clone A Sata Ssd To An M.2 Ssd?
To clone a SATA SSD to an M. 2 SSD, you can use cloning software like Acronis True Image or EaseUS Todo Backup.
Conclusion
Cloning your SATA SSD to an M. 2 drive is an efficient and beneficial process that can enhance the performance of your storage system.
By following the steps outlined in this guide, you can successfully transfer your data without losing any files or encountering compatibility issues.
With the increasing popularity of M. 2 SSDs, it’s important to stay updated with the latest technology and take advantage of the improved speed and reliability they offer.
Whether you’re a gamer, professional, or casual user, the benefits of upgrading to an M. 2
So, if you’re looking to optimize your computer’s storage capabilities, don’t hesitate to clone your SATA SSD to an M. 2 drive and experience the enhanced performance for yourself. Upgrade your storage experience now and unlock the full potential of your computer.

