How to Install Nvme Pcie Ssd? 6 Easy Steps!
Installing an NVMe PCIe SSD (Non-Volatile Memory Express Peripheral Component Interconnect Express Solid State Drive) is a relatively straightforward process, and it can significantly boost the speed and overall performance of your computer.
NVMe SSDs are known for their high-speed data transfer rates and low latency, making them a popular choice for upgrading storage in modern computers.
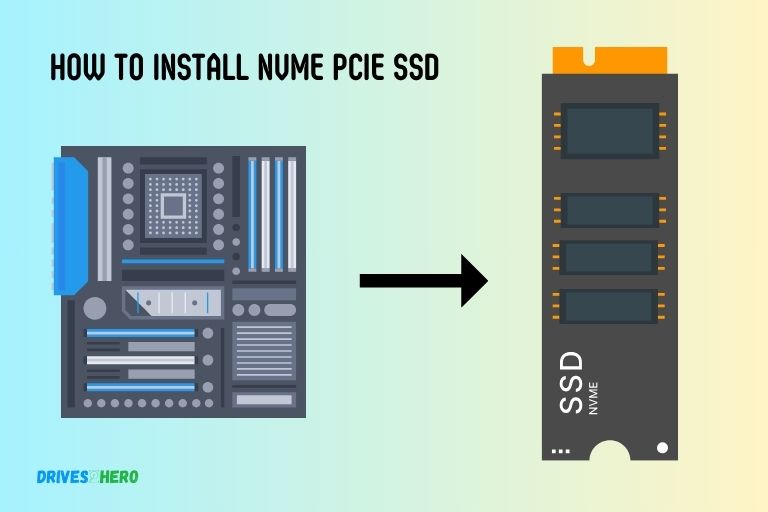
Here is a step-by-step guide on how to install an NVMe PCIe SSD:
Before You Begin
- Make sure your motherboard has an M.2 slot that supports NVMe PCIe SSDs. The slot will likely be labeled as “M.2 PCIe”.
- Have your NVMe PCIe SSD ready. It should come in an M.2 form factor.
- Backup any data on your current boot drive if you’re installing the NVMe drive as a boot drive.
1. Power Down Your PC
Shut down your computer and unplug the power cable before installing the NVMe drive.
2. Access the M.2 Slot
Refer to your motherboard manual on how to access the M.2 slot. Often times, you may need to remove a shielding plate or heatsink to expose the slot.
3. Insert the NVMe SSD
Line up the notch on the SSD with the key in the M.2 slot. Gently insert the drive at about a 30 degree angle. Push down and screw in the mounting screw to secure the drive.
4. Boot Up Your PC
Plug the power cable back in and boot up your PC. Make sure the drive is detected in the BIOS.
5. Partition and Format the Drive
Use Disk Management in Windows to create a new partition on the drive and format it. The drive should now be available for use.
6. Install OS or Data
If installing as a boot drive, reinstall your operating system now. Otherwise, you can start adding data to the new drive.
That’s it! With those steps, you should have an NVMe PCIe SSD installed and ready to use in your system. Let me know if you need any clarification or have additional questions!
Why Upgrade To An Nvme Pcie Ssd
Upgrade your storage to an NVMe PCIe SSD for faster performance. Learn how to install the NVMe PCIe SSD to boost your system’s speed and efficiency.
When it comes to storage solutions, NVMe PCIe SSDs have emerged as a game-changer in the tech world.
With their lightning-fast speeds and unparalleled performance, upgrading to an NVMe PCIe SSD can enhance your computer’s overall efficiency and productivity.
We will explore the benefits of NVMe PCIe SSDs and compare them with traditional storage options. So, let’s delve into why you should consider upgrading to an NVMe PCIe SSD.
Benefits Of Nvme Pcie Ssds
Speed: NVMe PCIe SSDs boast remarkable speeds that leave traditional storage options trailing behind.
Harnessing the power of the PCIe interface, NVMe SSDs offer blazingly fast read and write speeds, significantly reducing loading times and data transfer delays.
Performance: With NVMe PCIe SSDs, you can experience an exponential increase in performance compared to conventional hard drives or even SATA-based SSDs.
These next-generation storage drives leverage the latest technology to deliver exceptional responsiveness and seamless multitasking capabilities, allowing you to boost your productivity effortlessly.
Energy Efficiency: NVMe PCIe SSDs consume less power compared to their predecessors, making them an ideal choice for portable devices and laptops.
Not only do they provide substantial energy savings, but they also generate less heat, ensuring optimal system performance and a cooler computing experience.
Form Factor: Designed with a compact form factor, NVMe PCIe SSDs are smaller and lighter than traditional HDDs, making them perfect for modern, slim devices such as ultrabooks and tablets.
Their reduced size does not compromise their storage capacity, as they offer impressive storage options ranging from 128GB to several terabytes.
Reliability and Durability: NVMe PCIe SSDs deliver exceptional reliability and durability.
Unlike mechanical hard drives, which contain spinning disks and moving parts susceptible to damage, NVMe SSDs have no such components, making them shock-resistant and less prone to failures caused by physical impact.
Preparing Your System For Installation
Preparing your system for installation of an NVMe PCIe SSD requires a few crucial steps. From ensuring compatibility to updating your BIOS and drivers, this guide will help you smoothly install your high-performance storage device for optimal speed and efficiency.
Checking Motherboard Compatibility
Before installing an NVMe PCIe SSD, it’s crucial to ensure that your motherboard supports this technology.
Here are the steps to check for compatibility:
- Consult your motherboard’s user manual or visit the manufacturer’s website to verify NVMe SSD support.
- Look for the M.2 socket on your motherboard. NVMe SSDs are typically installed in M.2 slots, so make sure your motherboard has one.
- Check the motherboard’s specifications for the type of M.2 slot supported, whether it’s M key or B+M key. This information is essential for selecting the right NVMe drive.
- If you are unsure about compatibility, reach out to the motherboard manufacturer’s customer support for assistance.
Ensuring Bios Support For Nvme
The BIOS (Basic Input/Output System) in your computer’s firmware plays a critical role in recognizing and initializing NVMe PCIe SSDs.
To ensure proper functioning, follow these steps:
- Update your motherboard’s BIOS to the latest version available. Check the manufacturer’s website and download the appropriate BIOS update utility.
- Install the update utility and follow the instructions provided to flash the BIOS.
- After the BIOS update, restart your computer and enter the BIOS setup menu. The key to access the BIOS varies depending on the motherboard manufacturer (common keys include F2, Del, and Esc).
- Within the BIOS setup, navigate to the storage configuration section and enable NVMe support if available. Look for options like “NVMe RAID Mode” or “NVMe Boot Support.” Save your changes and exit the BIOS.
Verifying Available Physical Space
NVMe PCIe SSDs come in various form factors, and it’s essential to ensure that your system has enough physical space to accommodate the selected drive.
Here’s what you need to do:
- Measure the available space in your computer case. Consider both the length and width available for the NVMe drive to fit comfortably.
- Check the specifications of the NVMe SSD you intend to install. Take note of its dimensions and form factor, such as 2280 (22mm wide, 80mm long) or 2242 (22mm wide, 42mm long).
- Compare the available space in your case with the dimensions of the NVMe SSD. Ensure that there is enough clearance and that no other components obstruct the installation.
- If space is limited or incompatible, you may need to consider alternative solutions, such as purchasing a different NVMe SSD form factor or utilizing an expansion card to accommodate the drive.
Remember to follow these steps to prepare your system adequately before proceeding with the installation of an NVMe PCIe SSD.
Checking motherboard compatibility, ensuring BIOS support, and verifying physical space are crucial factors to consider for a successful installation.
Configuring The Nvme Pcie Ssd
Learn how to configure and install an NVMe PCIe SSD with our comprehensive step-by-step guide. Maximize your computer’s storage performance easily and efficiently.
If you’re looking to enhance the performance and speed of your system, configuring an NVMe PCIe SSD is the way to go.
This powerful storage solution is designed to optimize the overall functionality of your computer. We’ll walk you through the necessary steps to configure your NVMe PCIe SSD effectively.
Entering Bios Settings:
Configuring the NVMe PCIe SSD requires accessing the BIOS settings on your computer.
Follow these steps to enter the BIOS:
- Restart your computer.
- During the boot process, look for the specific key to access the BIOS settings. Commonly used keys are F2, Del, or Esc. Refer to the manufacturer’s documentation if you’re unsure.
- Press the designated key repeatedly until the BIOS menu appears.
Enabling Nvme Support:
To enable NVMe support on your system, you’ll need to follow these steps:
- Locate the “Storage” or “Advanced” tab in the BIOS menu.
- Navigate to the “NVMe Configuration” or similar option.
- Ensure that NVMe support is set to “Enabled.” If not, select it and press Enter to enable it.
Adjusting Boot Order:
After enabling NVMe support, it’s essential to adjust the boot order to prioritize your NVMe PCIe SSD.
Here’s how to do it:
- Locate the “Boot” or “Boot Order” tab in the BIOS menu.
- Move the NVMe PCIe SSD to the top of the boot order list. This ensures that your system boots from the NVMe PCIe SSD first.
- Save the changes and exit the BIOS settings.
By following these steps, you will successfully configure your NVMe PCIe SSD, optimizing your system’s performance and enjoying lightning-fast data transfer speeds.
Cloning Or Fresh Installation
Discover the steps needed to install an NVMe PCIe SSD with either the cloning or fresh installation method, ensuring a speedy and efficient process for your storage needs.
Transferring Data From The Existing Drive
If you’re upgrading to an NVMe PCIe SSD, you have two options for migrating your data: cloning the existing drive or performing a fresh installation.
Both methods have their advantages and it’s important to choose the one that suits your needs.
Here, we’ll dive into the details of transferring data from the existing drive:
Using Cloning Software For Seamless Migration
Cloning your existing drive to the new NVMe PCIe SSD ensures a seamless transition, without the need to reinstall your operating system and applications.
Here are the key steps involved in using cloning software:
- Connect both the existing drive and the new NVMe PCIe SSD to your computer.
- Install and open the cloning software.
- Select the source drive (existing drive) and the destination drive (NVMe PCIe SSD).
- Choose the cloning options, such as disk layout and partition size adjustments.
- Initiate the cloning process and wait for it to complete.
- Once the cloning is done, shut down your computer and disconnect the old drive.
- Power on your computer with the new NVMe PCIe SSD as the primary boot drive.
Using cloning software streamlines the process, ensuring a smooth transfer of all your files, applications, and settings to the new NVMe PCIe SSD.
Performing A Clean Installation Of The Operating System
If you prefer a fresh start or if your existing drive is faulty and you don’t want to clone it, you can perform a clean installation of the operating system on your new NVMe PCIe SSD.
Here’s how:
- Create a bootable USB drive with the operating system installation media.
- Shut down your computer and connect the NVMe PCIe SSD.
- Power on your computer and enter the boot menu.
- Select the USB drive as the boot device.
- Follow the on-screen instructions to install the operating system on the NVMe PCIe SSD.
- Once the installation is complete, configure the settings and install essential drivers.
Performing a fresh installation gives you a clean slate, allowing you to start afresh with your new NVMe PCIe SSD and carefully choose which files and applications to transfer.
Remember, whether you choose to clone your existing drive or perform a fresh installation, it’s crucial to back up your important data before proceeding. This ensures that you have a failsafe in case anything goes wrong during the process.
Verifying Successful Installation
After installing an NVMe PCIe SSD, make sure to verify its successful installation. Check the device manager to ensure the SSD is detected and recognized by the system.
Alternatively, you can use diagnostic software to confirm the proper functioning of the NVMe PCIe SSD.
After successfully installing an NVMe PCIe SSD, it is essential to verify that the installation was completed correctly. This section will guide you through the process of ensuring a successful installation.
Checking Device Manager For Proper Detection
To confirm that your NVMe PCIe SSD has been properly detected by your system, follow these steps:
- Press the Windows key + X and select Device Manager from the menu.
- Expand the Disk drives category and look for the name of your NVMe PCIe SSD.
- Ensure that there are no yellow exclamation marks or error icons next to the SSD’s name.
- If there is an error, try reseating the SSD or updating the drivers.
- Confirm that the NVMe PCIe SSD appears under the Storage controllers category as well.
- If it does not, you may need to update your motherboard’s BIOS or check for any compatibility issues.
Confirming Increased Performance And Speed
After installing an NVMe PCIe SSD, you should experience a significant improvement in performance and speed compared to traditional storage mediums.
Here are a few ways to confirm this improvement:
- Open your favorite applications or games and observe how quickly they launch.
- Copy and transfer large files between different drives to test the speed.
- Measure the time it takes for your computer to boot up and become fully operational.
- Notice any reduction in the loading times of software or games.
- These improvements are a result of the NVMe SSD’s faster read and write speeds.
Running Benchmark Tests For Comparison
Benchmark tests can provide quantitative data to compare the performance of your NVMe PCIe SSD with your previous storage solution.
Consider running the following benchmark tests for an accurate comparison:
CrystalDiskMark: This benchmark tool measures sequential and random read/write speeds.
- Run the test on both your NVMe PCIe SSD and your old storage drive.
- Compare the results to see the speed difference.
ATTO Disk Benchmark: This tool gauges the performance of your drive at various transfer sizes.
- Perform the test on your NVMe PCIe SSD and record the results.
- Repeat the process on your previous storage drive and compare the outcomes.
UserBenchmark: This tool provides an overall performance score by comparing your system with similar hardware configurations.
- Note the improvement in performance score after installing the NVMe PCIe SSD.
By running these benchmark tests, you can obtain precise figures to confirm the enhanced performance and speed brought by your new NVMe PCIe SSD.
Remember to ensure the successful detection of your SSD in the Device Manager, observe the improved performance in everyday use, and run benchmark tests for accurate comparisons.
Making sure to verify the installation will give you confidence in your newly installed NVMe PCIe SSD and the benefits it brings to your system.
Troubleshooting Common Issues
Learn how to troubleshoot common issues that may arise during the installation of an NVMe PCIe SSD with our step-by-step guide.
From checking compatibility to ensuring proper connection, we provide easy-to-follow instructions for a seamless installation process.
So you’ve successfully installed your NVMe PCIe SSD – congratulations! However, like with any technical process, there can be some common issues that you might encounter along the way.
Don’t fret! We’ve got you covered with troubleshooting tips to help you resolve these problems swiftly and get your NVMe PCIe SSD up and running smoothly.
Troubleshooting Bios Conflicts:
- Incompatible BIOS settings: Ensure that your system’s BIOS settings are configured correctly for your NVMe PCIe SSD.
- Outdated BIOS version: Update your BIOS to the latest version provided by your motherboard manufacturer.
- Disable CSM: If you recently switched from a traditional SATA drive to an NVMe PCIe SSD, make sure to disable Compatibility Support Module (CSM) in the BIOS settings.
Resolving Driver Conflicts:
- Update drivers: Check for the latest drivers for your NVMe PCIe SSD from the manufacturer’s website and install them.
- Remove conflicting drivers: If you have any conflicting drivers from previous storage devices, uninstall them to prevent conflicts with your NVMe PCIe SSD.
Identifying Hardware Conflicts:
- Check physical connections: Ensure that your NVMe PCIe SSD is properly connected to the motherboard and that all cables are securely attached.
- Check compatibility: Verify that your NVMe PCIe SSD is compatible with your motherboard and any other hardware components.
- Test with alternative hardware: If you suspect a hardware conflict, try using your NVMe PCIe SSD on a different system or motherboard to identify if the issue lies with your current hardware configuration.
Remember, troubleshooting common issues during the NVMe PCIe SSD installation process is part of the journey.
By following these troubleshooting tips, you’ll be able to identify and resolve any conflicts, ensuring a seamless and efficient experience with your new NVMe PCIe SSD.
Optimizing Nvme Pcie Ssd Performance
Boost the performance of your NVMe PCIe SSD by following these simple steps to install it properly. Improve speed and efficiency with optimized settings for maximum performance. Get the most out of your SSD with these helpful tips.
Modern storage technology has revolutionized the way we store and access data. NVMe PCIe SSDs, with their lightning-fast speeds, are a testament to this advancement.
To ensure you’re getting the most out of your NVMe PCIe SSD, there are a few optimization techniques you can employ. We’ll explore three essential strategies to enhance your SSD’s performance.
Enabling Trim For Ssd Maintenance
To maintain the optimal performance of your NVMe PCIe SSD, enabling TRIM is crucial. TRIM is a command that allows the operating system to communicate with the SSD and inform it which data blocks are no longer in use.
This process helps the SSD identify and erase these unused blocks, ensuring efficient storage operations.
To enable TRIM on your NVMe PCIe SSD:
- Windows users can open the Command Prompt as an administrator and type: `fsutil behavior set DisableDeleteNotify 0`.
- Mac users can use the “trimforce” command in the Terminal: `sudo trimforce enable`.
Remember that some operating systems may enable TRIM automatically, so it’s essential to verify whether it’s enabled on your specific setup.
Utilizing Manufacturer-Provided Software For Optimization
Most SSD manufacturers provide optimization software tailored specifically for their devices. These software tools offer a range of features to enhance your NVMe PCIe SSD’s performance and lifespan.
By utilizing manufacturer-provided software, you can:
- Update firmware: Firmware updates address performance issues, security vulnerabilities, and compatibility improvements. Ensure you frequently check for firmware updates and apply them promptly.
- Monitor health: Manufacturer software often includes diagnostic tools to monitor the health of your NVMe PCIe SSD. By tracking its performance, temperature, and overall health, you can identify potential issues early on.
- Optimize settings: Some optimization software offers additional settings to fine-tune your SSD’s performance, such as adjusting cache usage, over-provisioning, and power management settings. Experimenting with these settings can help maximize your SSD’s capabilities.
Implementing Power Management Settings
Properly configuring power management settings is another way to optimize your NVMe PCIe SSD’s performance. By balancing power consumption and performance, you can ensure your SSD operates efficiently without sacrificing speed.
Consider the following power management settings:
Link Power Management (LPM): LPM allows your SSD to enter a low-power state when idle, saving energy while minimizing latency spikes.
Enabling LPM can be done through your operating system’s power settings or the manufacturer’s software.
Non-Volatile Memory Host Controller Interface (NVMeHCI): NVMeHCI regulates the SSD’s power state transitions to maintain optimal performance.
Using tools provided by the manufacturer, users can adjust these settings to strike a balance between power consumption and responsiveness.
Optimizing your NVMe PCIe SSD performance is essential to fully leverage its capabilities.
By enabling TRIM, utilizing manufacturer-provided software, and implementing power management settings, you can ensure your SSD operates at peak performance, providing lightning-fast speeds and reliable storage for your data.
Maintenance And Care
Discover the essential steps for installing an NVMe PCIe SSD in this informative guide. Learn how to properly maintain and care for your new SSD to optimize its performance and longevity.
Regularly Updating Firmware
Updating the firmware of your NVMe PCIe SSD is crucial to ensure optimal performance and fix any potential bugs or security vulnerabilities.
Here are a few tips to help you with regular firmware updates:
- Check the manufacturer’s website: Stay up to date with the latest firmware releases by visiting the manufacturer’s website. Look for any firmware updates specifically designed for your NVMe PCIe SSD model.
- Download the firmware update: Once you’ve identified the appropriate firmware update, download it to your computer. Make sure to choose the correct firmware version for your specific SSD model.
- Follow the instructions: Before proceeding with the firmware update, carefully read the instructions provided by the manufacturer. These instructions will guide you through the updating process and ensure that you avoid any potential pitfalls.
- Backup your data: Before initiating the firmware update, it’s always a good idea to create a backup of your important data. While the update process is typically safe, it’s better to be safe than sorry in case something goes wrong during the update.
- Run the update: Once you have ensured that your data is backed up, proceed with running the firmware update as per the provided instructions. Follow each step carefully to ensure a successful update.
- Verify the update: After the firmware update is complete, it’s important to verify that it was successful. Check the NVMe PCIe SSD’s firmware version to confirm that it matches the updated version mentioned by the manufacturer.
Monitoring Drive Health And Temperature
To maintain the longevity and performance of your NVMe PCIe SSD, it’s essential to monitor its health and temperature regularly.
Here are a few key points to keep in mind when monitoring your drive:
Use manufacturer-provided software: Many SSD manufacturers offer dedicated software tools that allow you to monitor the health and temperature of your NVMe PCIe SSD. Install and utilize these tools to stay informed about the drive’s condition.
Watch for warning signs: Keep an eye out for warning signs that may indicate potential issues with the SSD.
These signs may include increased read/write errors, slow performance, or unexpected crashes. Addressing these issues promptly can help prevent further damage to the SSD.
Check SMART attributes: SMART (Self-Monitoring, Analysis, and Reporting Technology) attributes provide valuable information about your SSD’s health.
Monitor these attributes regularly using the manufacturer’s software and take action if any attribute values indicate a problem.
Maintain adequate airflow: NVMe PCIe SSDs can generate heat during intensive operations. Ensure that your computer’s cooling system is functioning optimally and that the SSD has enough airflow to prevent overheating.
Avoid extreme temperatures: Excessive heat or cold can impact the performance and lifespan of your SSD.
Avoid exposing your NVMe PCIe SSD to extreme temperatures and keep it within the recommended operating temperature range specified by the manufacturer.
Performing Periodic Data Backups
Data backups are an essential part of maintaining the integrity and security of your information stored on the NVMe PCIe SSD.
To ensure that you don’t lose your data unexpectedly, consider the following practices for performing periodic backups:
- Choose a backup solution: Select a backup solution that suits your needs, whether it be cloud-based storage, external hard drives, or dedicated backup software. Research and compare different options to find the best fit for your requirements.
- Establish a backup schedule: Create a consistent backup schedule to periodically back up your data. Depending on the importance and frequency of changes to your files, you may choose to perform daily, weekly, or monthly backups.
- Include all critical data: Ensure that all important files, folders, and applications are included in the backup. Consider creating a checklist of essential items to verify that nothing is missed during the backup process.
- Test your backups: Regularly test your backups to confirm their integrity and ensure that you can successfully restore your data if necessary. This step is often overlooked but is crucial for reassurance that your backups are functional and up to date.
- Keep multiple copies: It’s recommended to maintain multiple copies of your backups in different locations. This strategy provides an extra layer of protection against hardware failures, accidents, or natural disasters that could impact your primary storage and backups simultaneously.
- Update your backups: As you make changes to your files and data, make sure to update your backups accordingly. Regularly syncing your backups with the current state of your data will prevent any discrepancies or missing files in case of a restoration.
Remember, regularly updating your firmware, monitoring drive health and temperature, and performing periodic data backups are essential for the long-term performance and reliability of your NVMe PCIe SSD.
By implementing these maintenance and care practices, you can enjoy a smooth and secure computing experience while maximizing the lifespan of your storage solution.
Conclusion
Installing an NVMe PCIe SSD can greatly enhance the performance and speed of your computer system.
By following the step-by-step guide provided in this blog post, you can successfully install your NVMe PCIe SSD and begin reaping the benefits immediately.
With faster boot times, quicker file transfers, and improved overall system responsiveness, your computing experience will be taken to a whole new level.
Remember to always consult your motherboard’s manual for compatibility and installation instructions specific to your system.
Additionally, regularly updating the firmware and drivers for your NVMe SSD can ensure optimal performance and compatibility with the latest technologies.
So go ahead, take the plunge, and enjoy the power and speed of an NVMe PCIe SSD in your computer setup.

