How to Upgrade to Ssd Windows 7
“Ready to breathe new life into your Windows 7 system? Upgrading to an SSD is a fantastic way to boost performance and responsiveness. In this guide, we’ll walk you through the process of upgrading your Windows 7 PC to an SSD, step by step. Say goodbye to sluggish boot times and hello to lightning-fast speeds! Let’s get started on transforming your Windows 7 experience with an SSD upgrade.”
To upgrade to an SSD on Windows 7, start by purchasing a compatible SSD and a SATA-to-USB cable. Next, use cloning software to copy your current hard drive to the new SSD.
Upgrading to an SSD (Solid State Drive) from a traditional hard drive is a powerful way to boost your Windows 7 computer’s performance. A typical SSD offers faster data access, quicker boot times, and overall snappier system responsiveness. Before beginning the upgrade process, ensure you back up important data to avoid any potential loss during the transition.
Select an SSD with enough storage for your needs and confirm its compatibility with your system. Utilizing reliable drive-cloning software simplifies the process of transferring your operating system and files to the new drive. Once the clone is complete, physically replace the old drive with your new SSD and enjoy a revitalized Windows 7 experience. Remember to tweak your BIOS settings if required, to boot from the new drive.

Key Takeaway
“Upgrade to SSD on Windows 7: Simple Step-by-Step Guide”
Step 1: Back Up Your Data
Begin by backing up all your important data to an external storage device or a cloud service. This ensures you won’t lose any files during the upgrade process.
Step 2: Check Compatibility
Verify that the SSD you intend to install is compatible with your Windows 7 system. Consider factors like physical size (2.5-inch or M.2), interface (SATA or NVMe), and capacity.
Step 3: Gather Necessary Tools
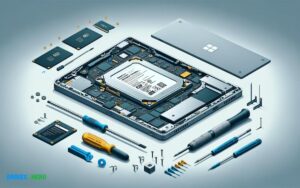
Collect the tools needed for the upgrade, including a screwdriver for opening your computer’s casing and handling screws.
Step 4: Clone Your HDD to SSD
Use disk cloning software such as EaseUS Todo Backup, Macrium Reflect, or Clonezilla to clone your existing HDD to the new SSD. Follow the software’s instructions to create an exact copy of your Windows 7 installation and data.
Step 5: Physically Install the SSD
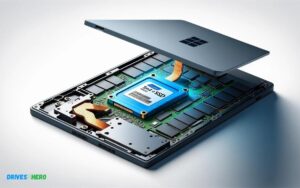
Shut down your computer and disconnect all cables. Open the casing using the screwdriver and locate the existing HDD. Carefully remove it and install the new SSD in the same slot, securing it with screws.
Step 6: Boot Up Your Computer
Reconnect all cables, close the casing, and boot up your computer. Enter the BIOS/UEFI settings if necessary to ensure the SSD is detected.
Step 7: Verify the Cloned Data
Once your computer boots into Windows 7, verify that all your data and applications are present on the SSD. Open files and programs to confirm everything is functioning correctly.
Step 8: Enjoy Your Upgraded SSD
Congratulations! You’ve successfully upgraded to an SSD on Windows 7. Enjoy the faster performance and improved responsiveness of your system.
In conclusion, by following these straightforward steps, you can smoothly upgrade to an SSD on your Windows 7 system. Backing up your data, ensuring compatibility, cloning your HDD to the SSD, and physically installing the SSD are essential tasks to complete. Once done, enjoy the enhanced performance and responsiveness that the SSD brings to your Windows 7 computer.
Introduction To Ssd Upgrades On Windows 7 Systems
Replacing a traditional Hard Disk Drive (HDD) with a Solid State Drive (SSD) is a significant enhancement for any Windows 7 system. This upgrade promises not only a remarkable boost in performance but also a revitalization for older computers struggling to keep up with modern demands. The process might seem daunting at first, but understanding how to properly execute an SSD upgrade can extend your PC’s lifespan and improve your computing experience substantially. This section delves into the crucial steps to consider when transitioning to an SSD on a Windows 7 machine.
Understanding The Benefits Of Ssd Over Hdd
Switching to an SSD from an HDD yields numerous advantages:
- Speed: SSDs boast significantly faster read/write speeds, which translate to quicker boot times, faster file transfers, and overall snappier system responsiveness.
- Durability: With no moving parts, SSDs are more resistant to shock and damage, providing superior data protection.
- Energy Efficiency: SSDs consume less power, which can lead to longer battery life for laptops.
- Quiet Operation: The absence of mechanical parts results in a silent operation, enhancing the user’s computing experience.
Compatibility Considerations For Ssd Upgrades With Windows 7
To ensure a successful SSD upgrade, consider these compatibility factors:
| Factor | Details |
|---|---|
| BIOS Support | Ensure your BIOS supports SSDs. An update might be necessary for older systems. |
| SATA Interface | Most SSDs use SATA interfaces. Verify the version (SATA I, II, III) your motherboard supports. |
| Driver Support | Windows 7 may require specific SSD drivers for optimal performance. |
| Form Factor | SSDs come in various sizes. Check your case or laptop for compatibility. |
Preparing For An Ssd Upgrade: Backup And Data Safety
Before embarking on an SSD upgrade, it’s crucial to protect your data:
- Create a complete backup of your current system to an external hard drive or cloud service.
- Consider using a disk cloning tool to transfer your operating system, applications, and data directly to the new SSD.
- Verify the data integrity by comparing the source and destination drives.
- Keep your original HDD as a second layer of backup until the SSD is confirmed to be stable and reliable.
Note: It’s also a good practice to gather all necessary SSD firmware updates, software tools, and installation guides beforehand to ensure a smooth transition.
Planning The Ssd Upgrade Process
Embarking on an SSD upgrade in a Windows 7 system is an exciting path to significantly boosted performance. The crux of such an endeavor lies in the careful orchestration of the upgrade process. Planning with meticulous attention to detail ensures a seamless transition from the old spinning hard drive to the lightning-fast experience of a Solid State Drive (SSD). Let’s guide you through the essentials you need in charting your upgrade journey.
Choosing The Right Ssd: Size And Brand
Selecting the ideal SSD for your Windows 7 machine hinges on two primary criteria: size and brand. The size of the SSD will depend on your storage requirements and budgetary considerations. To accommodate the operating system and essential programs, a 250GB SSD might suffice, but for extensive media collections or gaming libraries, a larger capacity of 500GB to 1TB is recommended.
As for the brand, market leaders like Samsung, Crucial, and Western Digital offer robust durability and warranty protection. Research and compare the read/write speeds and reliability ratings to find the right fit for your upgrade.
Tools And Software Required For Cloning Or Fresh Install
Upgrading to an SSD may involve cloning your current drive or performing a fresh installation of Windows 7. To execute either operation smoothly, the right tools and software are indispensable:
- Cloning software: Applications such as Clonezilla or Acronis True Image can duplicate your current hard drive’s content onto your new SSD.
- Screwdriver: A simple Philips-head screwdriver is often all that’s needed to physically install the SSD into the computer’s chassis.
- SATA-to-USB cable: Necessary for connecting the SSD externally if laptop space is limited or for cloning purposes.
- Backup system: Ensure you have a complete backup of your current system before starting, to prevent data loss.
Deciding Between Cloning The Existing Drive And A Fresh Installation
Choosing between cloning your existing hard drive and performing a fresh installation of Windows 7 can be a critical decision:
| Cloning | Fresh Install |
|---|---|
| Quick transition with all data and programs intact | Clean start, often leading to better system performance |
| May carry over software bloat or system issues | Requires reinstalling software and restoring data |
| Convenient if multiple systems are being upgraded | Ideal to purge outdated software and declutter |
A fresh installation is an opportunity to start anew, likely leading to a snappier system free from any legacy issues. However, it demands more time and effort in reinstalling applications and data. On the flip side, cloning presents a straightforward route to upgrade but could perpetuate existing system quirks. Weigh these considerations carefully to determine the optimal path for your Windows 7 SSD upgrade.
Physical Installation Of The Ssd
Ready to give your computer a performance boost? Upgrading to an SSD on Windows 7 is a game-changer when it comes to speed and efficiency. This informative section will guide you through the physical installation of your new solid-state drive (SSD). Whether you’re working with a desktop or a laptop, we’ll walk you through each step to ensure a smooth upgrade. And should you encounter any hiccups along the way, we’ve got the troubleshooting tips to get you through. So grab your SSD and let’s get started!
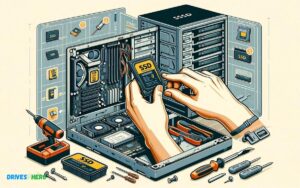
Step-by-step Guide To Installing An Ssd In A Desktop
- Power off your desktop and unplug all cables for safety.
- Open the desktop’s case to access its internal components.
- Locate the hard drive bay and remove the existing HDD if necessary.
- Slide the SSD into the drive bay. If the bay is too big, use a 2.5-inch to 3.5-inch adapter bracket.
- Secure the SSD using the provided screws or tools that came with your desktop or SSD kit.
- Connect the SATA data and power cables to the SSD.
- Reassemble the case and reconnect all cables.
- Boot up your computer to confirm the SSD is recognized in the BIOS.
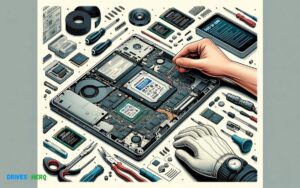
How To Install An Ssd In A Laptop
- Turn off the laptop and disconnect all power sources.
- Remove the back panel or the compartment that houses the current hard drive.
- Take out the existing hard drive, being careful with any screws or attachments.
- Insert the SSD into the hard drive slot. If the SSD does not fit snugly, use the spacer that may have come with your SSD.
- Reattach any screws or brackets to secure the SSD in place.
- Replace the back panel or compartment cover.
- Power up your laptop to ensure the BIOS recognizes the new SSD.
Troubleshooting Common Installation Issues
- If the SSD is not detected in BIOS, ensure the SATA data and power cables are properly connected.
- Check if the SSD is compatible with your motherboard’s BIOS version; an update may be needed.
- Re-seat the SSD in its slot or bay, ensuring a snug fit and proper alignment.
- If your computer still doesn’t recognize the SSD, try connecting it to a different SATA port on the motherboard.
- Consult the SSD’s manual for any specific installation requirements or settings.
Software Configuration And Optimization
Upgrading to a Solid State Drive (SSD) is one of the most efficient ways to breathe new life into an older Windows 7 machine. Not only do SSDs offer faster read and write speeds compared to traditional Hard Disk Drives (HDDs), but they can also significantly reduce system boot times and improve overall performance. After physically installing the SSD in your system, the next critical stage is software configuration and optimization. This process involves cloning your old drive, installing or reinstalling Windows 7, and tweaking settings for maximum efficiency. Let’s dive into the details with these key steps.
Cloning The Hard Drive To Ssd: Pros, Cons, And How-to
Cloning your existing hard drive to a new SSD has its advantages and drawbacks.
- Ease of Transition: Cloning your HDD to an SSD allows for a seamless transition without the need to reinstall your Operating System or software.
- Time-Saving: It’s generally faster than starting from scratch, particularly if you have a lot of data and custom settings.
However, there are some cons associated with cloning:
- Potential Compatibility Issues: Older files or fragmented data might not play well with the new SSD’s technology.
- Carrier of Junk Files: Cloning everything also means carrying over any bloat or unnecessary files that could impact SSD performance.
For those ready to clone, the process is straightforward:
- Connect the SSD to your system using a SATA-to-USB cable or a docking station.
- Use cloning software compatible with Windows 7 to copy the contents of your HDD to the SSD. Popular choices include EaseUS Todo Backup and Acronis True Image.
- Once cloning is complete, switch the boot priority in your BIOS to boot from the SSD.
Installing A Fresh Copy Of Windows 7 On An Ssd
Sometimes the best path forward is a clean slate. Installing a fresh copy of Windows 7 on your new SSD ensures the utmost in speed and efficiency.
- Begin by backing up all necessary files from your original HDD to an external drive or cloud storage.
- Create a Windows 7 installation media on a USB drive or DVD.
- Boot from the installation media and follow the on-screen instructions to install Windows 7 on the SSD.
- Once installed, restore your backed-up files and reinstall your programs.
Optimizing Windows 7 Settings For Ssd Performance
After installing Windows 7 on your SSD, optimizing a few settings can further improve performance and prolong the life of your drive.
| Setting | Action | Benefit |
|---|---|---|
| Disable Defragmentation | SSDs don’t require defragmentation; it could actually reduce their lifespan. | Reduces unnecessary write operations. |
| Turn off Indexing | Indexing speeds up searches on HDDs but is less helpful on SSDs. | Decreases the write operations on your SSD. |
| Enable TRIM | TRIM helps the OS know which blocks of data are no longer in use and can be wiped internally. | Helps to maintain the performance of the SSD over time. |
To disable defragmentation, navigate to the Disk Defragmenter and turn off the schedule for the SSD. Indexing can be turned off by accessing the properties of the SSD in ‘My Computer,’ unchecking ‘Allow files on this drive to have contents indexed,’ and applying the change. Ensure that the TRIM command is enabled by running fsutil behavior query DisableDeleteNotify from the command prompt — it should return a ‘0’.
Post-installation Steps
With the physical installation of your new SSD complete and Windows 7 successfully running, it’s time to ensure that everything is functioning optimally. These post-installation steps will help to verify the installation, maintain the SSD, and deal with the old hard drive. Follow along to get the most out of your upgraded system.
Verifying Ssd Installation And Performance
Confirmation of SSD Installation:
- Navigate to “Computer” and check for the presence of the new drive.
- Right-click on the SSD and select “Properties” to view the status and available space.
Performance Check:
- Utilize the Windows Experience Index to evaluate the performance improvements.
- Consider running benchmarks with tools like AS SSD Benchmark or CrystalDiskMark.
Ensure drivers are up to date and TRIM functionality is enabled by entering the following in the command prompt: fsutil behavior query DisableDeleteNotify. A result of ‘0’ confirms TRIM is active.
Data Management: What To Do With The Old Hard Drive
The old hard drive can serve as a valuable asset for data backup and additional storage. Consider the following options:
| Action | Benefits |
|---|---|
| Externally Encase for Backup | Provides an immediate extra layer of data protection. |
| Use as a Secondary Internal Drive | Allows for extended storage without occupying external space. |
| Secure Data Wipe and Donation | Contributes to electronics recycling efforts and aids those in need. |
Before repurposing, securely erase any sensitive information to prevent unauthorized access.
Maintaining Your Ssd: Best Practices And Tips
Maintaining the health and performance of your SSD is crucial. Implement the following tips:
- Avoid unnecessary writes to the SSD to extend its life.
- Ensure Regular System Maintenance such as disk cleanup and defragmentation is NOT scheduled for your SSD, as it’s not needed and may reduce lifespan.
- Keep your operating system and firmware up to date to ensure optimal compatibility and performance.
- Consider adjusting or disabling pagefile and hibernation settings to limit write operations.
- Enable the SSD Optimization in Windows Disk Defragmenter, which sends the TRIM command to optimize the SSD.
Monitor SSD health regularly using software like the manufacturer’s toolbox or third-party applications to predict and prevent potential failures.
Conclusion
Upgrading to an SSD on Windows 7 breathes new life into your PC, ensuring faster boot times and responsive applications. Remember to back up your data and follow the steps carefully for a smooth transition. Embrace the change for a significant performance boost that rejuvenates your computing experience.
Upgrade today and feel the difference!

Harold Williams is a senior writer and technical editor at Drives Hero with 20+ years of experience in IT administration. He specializes in storage systems, SSD reviews, and performance testing, bringing real-world insight to every guide.