How to Add a Drive Letter to an SSD in Windows 11
You installed a new SSD, or maybe you cloned your old drive over, and now Windows 11 shows it in Disk Management but it’s nowhere to be found in File Explorer. No drive letter means no access, even though the drive is clearly detected and working fine. This is one of the most common head-scratchers after an SSD upgrade, and the fix takes about two minutes once you know where to look.
Below is the full walkthrough, including what to do if the SSD is brand new versus recycled from another system, and what to check if the letter still won’t stick after a reboot.
Why Your SSD Doesn’t Have a Drive Letter
Windows assigns drive letters automatically to any partition it recognizes as usable storage. If a letter is missing, it’s usually one of these situations:
- The SSD is brand new and hasn’t been initialized or formatted yet
- The drive was previously used in another PC or external enclosure and still has old partition data Windows doesn’t want to touch automatically
- The letter was manually removed at some point, or a conflicting letter assignment exists
- The partition is a hidden system partition (like an EFI or recovery partition) that Windows intentionally hides from File Explorer
None of these situations are dangerous on their own. Adding a drive letter is a safe, non-destructive operation as long as you’re working with the correct partition. The risk only shows up if you start creating new partitions or formatting drives without double-checking which one you’re touching.
Step 1: Confirm the SSD Shows Up in Disk Management
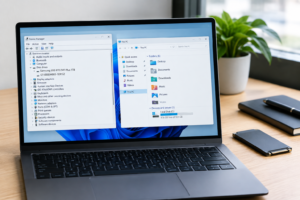
Before doing anything else, right-click the Start button and choose Disk Management. This opens a visual map of every drive connected to your PC, including ones without letters.
Look through the list of disks at the bottom of the window. Your new SSD should appear as a block of space, either labeled “Unallocated” (meaning it’s raw and unformatted) or showing an existing partition with no letter next to it. If you just installed a fresh SSD in your laptop and it shows as unallocated, you’ll need to initialize and format it first before a letter can be assigned.
If the Disk Shows “Not Initialized”
Right-click on the disk name (not the partition, the disk itself, usually labeled “Disk 1” or “Disk 2” on the left side) and select Initialize Disk. Choose GPT (GUID Partition Table) unless you have a specific reason to use MBR. GPT is the standard for Windows 11 systems and supports drives larger than 2TB.
Initializing a disk does not erase anything if it’s truly new or blank. But if the disk previously had data and Windows is asking you to initialize it, that usually means the partition table itself is corrupted or unreadable, not that the data is definitely gone. If you’re unsure, stop here and run recovery software or consult a data recovery service before proceeding.
Step 2: Assign a Drive Letter to an Existing Partition
If your SSD already shows a partition (a colored block with a size listed, not just black “Unallocated” space) but no letter, this is the easy case. Nothing gets erased here.
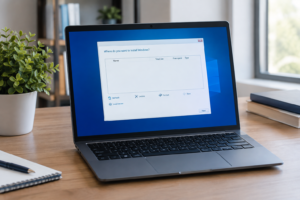
- Right-click directly on the partition block
- Select Change Drive Letter and Paths
- Click Add
- Choose a letter from the dropdown (Windows will only show letters that aren’t already in use)
- Click OK
The drive should appear in File Explorer within a few seconds. No restart needed.
Step 3: Create a New Volume (If the Space Is Unallocated)
If Disk Management shows the SSD as unallocated black space rather than an existing partition, you need to create a new volume before a letter means anything. This step does format the space, but since it’s unallocated, there’s nothing on it to lose.
- Right-click the unallocated space
- Select New Simple Volume and follow the wizard
- Assign a drive letter when prompted
- Choose NTFS as the file system for a standard Windows data drive (exFAT if you plan to share the drive with Macs or other devices)
- Leave allocation unit size at default unless you have a specific workload reason to change it
- Complete the wizard, and Windows will quick-format the volume
Important: only do this on unallocated space. If you see an existing partition with data on it and you accidentally choose to format instead of just assigning a letter, everything on that partition gets wiped. Always check for a listed file system (NTFS, FAT32, exFAT) before formatting anything, since that’s your sign real data might be present.
When This Won’t Work: Cloned or Migrated Drives
If your SSD is the result of cloning your old boot drive rather than a fresh install, the missing letter situation is a little different. A cloned system drive typically includes multiple partitions: the EFI system partition, a Microsoft Reserved partition, your main Windows volume, and sometimes a recovery partition. Windows deliberately hides the EFI and recovery partitions from File Explorer, and that’s completely normal, you don’t want or need a letter on those.
If you’re trying to add a letter to what should be your main Windows partition after cloning and it’s not showing up, check a few things first:
- Capacity mismatch: if your destination SSD is smaller than the source drive’s used space, cloning software may fail to create a proper partition layout. Always confirm your target SSD has more capacity than the data you’re moving.
- BitLocker or device encryption: if the source drive had encryption enabled, a straight sector clone can leave the destination partition in a locked or unrecognized state. Decrypt before cloning, or use cloning software that explicitly supports encrypted volumes.
- Boot mode mismatch: if your BIOS/UEFI is set to Legacy/CSM boot and the cloned drive uses GPT, Windows may not read it correctly. Check your UEFI boot mode matches the partition style of the new drive.
If you’re setting up a clone as your new boot drive rather than a secondary storage drive, don’t assign it a letter at all before swapping it in as primary. Just clone it, physically swap the drives (or set boot priority in BIOS), and let Windows boot from it directly. Adding a letter matters mainly for secondary or data drives, not for a drive you intend to boot from.
Before you wipe or remove the old drive: boot fully into Windows from the new SSD, confirm all your files, applications, and settings are present, and run it for at least a few days under normal use. Only after you’ve verified everything works should you consider reformatting or removing the old drive. This single verification step saves more people from data loss than almost anything else in the migration process.
Frequently Asked Questions
Will adding a drive letter delete my files?
No, not if you’re assigning a letter to an existing partition that already shows a file system like NTFS. Data loss only happens if you create a new volume or format unallocated space, which by definition has nothing on it yet, or if you mistakenly format a partition instead of just assigning it a letter.
Why does my SSD show up in Disk Management but not in the BIOS?
This usually points to a connection or power issue rather than a partition problem. Check that the SATA or NVMe connection is fully seated, and if it’s an NVMe drive, confirm your BIOS/UEFI has the correct M.2 slot enabled, since some motherboards disable a slot when another is in use.
Do I need to reboot after assigning a drive letter?
No. Drive letter changes take effect immediately in Disk Management. If the drive still doesn’t show up in File Explorer after a few seconds, close and reopen File Explorer, or double-check you clicked OK to confirm the letter assignment rather than just closing the dialog.

James Kennedy is a writer and product researcher at Drives Hero with a background in IT administration and consulting. He has hands-on experience with storage, networking, and system performance, and regularly improves and optimizes his home networking setup.