How to Install a Pcie Ssd? 10 Steps!
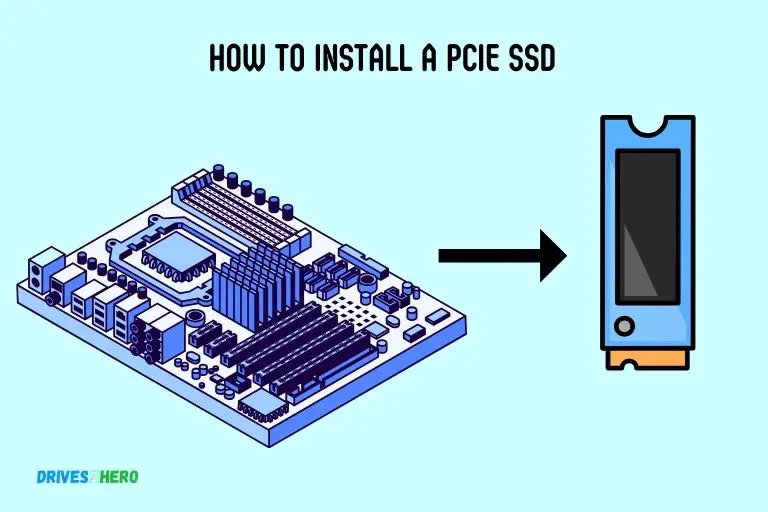
PCIe SSDs (PCI Express Solid State Drives) are becoming increasingly popular for their fast speeds and high performance. Installing a PCIe SSD in your desktop computer is a relatively simple process that can provide a significant speed boost.

Installing a PCIe SSD: Step-by-Step Guide
Prerequisites
Before installing a PCIe SSD, make sure you have the following:
Hardware
- PCIe SSD
- Desktop computer with available PCIe slot
- Phillips screwdriver
Software
- Latest motherboard BIOS/UEFI firmware
- Operating system installation media (if installing OS on PCIe SSD)
Step 1. Power off computer and disconnect power cable
Shut down your computer through the operating system, then flip the power switch on the power supply to off. Unplug the power cable from the back of the computer.
Step 2. Open computer case
Use the Phillips screwdriver to remove the side panel from the desktop case so you can access the internal components.
Step 3. Locate open PCIe slot
Check your motherboard manual to identify an open PCIe x4 or higher slot you can use for the SSD. Make sure the slot is not blocked by any expansion cards.
Step 4. Install SSD in PCIe slot
Line up the PCIe SSD with the slot and gently press it into place until it clicks and locks. Use the small screw on the slot bracket to secure the drive.
Step 5. Connect power cable
Use a spare power cable from your power supply to connect to the SSD. Consult the SSD manual for correct power cable type.
Step 6. Close computer case
Replace the side panel and screw it back in place. Reconnect the power cable.
Step 7. Boot into BIOS
Power on the computer and enter the system BIOS (or UEFI firmware). The PCIe SSD should be detected.
Step 8. Configure BIOS
Enable PCIe and NVMe support if needed. Adjust boot order to boot from the PCIe SSD first. Save changes and exit BIOS.
Step 9. Install operating system
If installing your OS on the PCIe SSD, boot from the OS installation media. Follow the on-screen prompts to install the OS to the PCIe SSD.
Step 10. Enjoy the speed!
Once powered back on, your operating system should now be running super fast on the new PCIe SSD. Enjoy the performance boost!
Installing a PCIe SSD is straightforward with some simple preparation. By following these step-by-step instructions, you can get your new high-speed SSD up and running smoothly. Just be sure to configure your motherboard BIOS correctly for PCIe and boot support.
Preparing Your System For Installation
Optimize your system for smooth installation of a PCIe SSD with these essential steps. Follow our expert guidelines to ensure a seamless process and enhance your computer’s performance.
Checking Your System’s Specifications
Begin the installation process by first checking your system’s specifications to ensure compatibility with the PCIe SSD. Refer to the manufacturer’s website or user manual for detailed information regarding hardware compatibility.
Key specifications to consider include:
- Motherboard support for PCIe SSDs.
- Available PCIe slot(s) on the motherboard.
- Compatibility with the PCIe SSD form factor (e.g., M.2, U.2, or PCIe add-in card).
- Supported operating systems.
- It’s crucial to confirm that your system meets these requirements to avoid any issues during the installation process.
Updating Bios And Firmware
Before proceeding, it is essential to update your system’s BIOS (Basic Input/Output System) and firmware to the latest versions.
Updating the BIOS and firmware ensures that your motherboard and components can effectively communicate with the PCIe SSD.
Here’s how to do it:
- Visit the manufacturer’s website and locate the support or downloads section.
- Identify the correct BIOS and firmware updates for your specific motherboard model.
- Download the updates and carefully follow the provided instructions for installation.
- Restart your system after completing the updates.
- Keeping your BIOS and firmware up to date minimizes compatibility issues and maximizes the performance of your PCIe SSD.
Backing Up Important Data
- Prior to installing the PCIe SSD, it is highly recommended to back up any important data on your current storage devices. While the installation process shouldn’t affect existing drives, data loss can occur due to unforeseen circumstances.
Here are some options to consider for backing up your data:
- Use an external hard drive or SSD to create a full system backup using reliable backup software.
- Cloud storage services offer convenient options for backing up important files and documents.
- Copy essential data to another internal storage device, such as a secondary hard drive or SSD.
- Make sure to verify the integrity of your backups before proceeding with the installation. This precaution ensures that your valuable data remains safe throughout the process.
Remember, preparing your system for the installation of a PCIe SSD includes checking system specifications, updating BIOS and firmware, and backing up important data.
By following these steps, you’ll have a smooth installation experience and be ready to enjoy the increased speed and performance offered by a PCIe SSD.
Opening Your Computer Case
To install a PCIe SSD, start by opening your computer case, locating the PCIe slot, and inserting the SSD firmly into the slot. Replace the case cover and power on your computer to enjoy fast and efficient storage.
Safety Precautions
To ensure a safe and smooth installation process, keep the following safety precautions in mind:
- Turn off your computer and unplug it from the power source.
- Avoid wearing any jewelry or static-inducing clothing to prevent electrostatic discharge.
- Touch a grounded metal surface to discharge any static electricity from your body before handling any internal components.
- Work on a non-static surface and use an anti-static wrist strap or mat to further prevent static damage.
- Take note of the location and connections of your cables before removing any components, ensuring an easier reassembly later.
Tool Requirements
Before you start, gather the necessary tools for opening your computer case.
These tools will aid you in safely accessing the internal components:
- A screwdriver set with various sizes, including both Phillips and flathead screwdrivers.
- An anti-static wrist strap or mat for protection against static electricity.
- Cable ties or twist ties to manage your cables neatly.
By following these preliminary steps, you are now ready to proceed with the installation of your PCIe SSD. Remember to handle the internal components with care, and always refer to your computer’s manual for any specific instructions pertaining to your case model.
Connecting Power And Data Cables
Connect your power and data cables to properly install a PCIe SSD for faster storage performance. Follow the guidelines for a seamless connection and enhanced productivity.
Identifying The Appropriate Power And Data Connectors
Before you begin connecting the cables, it’s essential to identify the appropriate power and data connectors on your SSD and motherboard. Take a moment to locate these connectors to ensure a smooth installation experience.
Here’s what you need to know:
- Power Connector: The power connector on your SSD is a small, rectangular socket typically located along one side of the drive. This connector allows the SSD to receive power and operate efficiently.
- Data Connector: The data connector on your SSD is another important socket that enables the transfer of data between the SSD and your motherboard. It is usually a small, rectangular-shaped socket located alongside the power connector.
Attaching The Power Cable To The Ssd
Once you have identified the power connector on your SSD, it’s time to attach the power cable.
Follow these steps to complete this process:
- Turn off your computer: Before you begin, make sure your computer is powered off and unplugged from any power sources.
- Locate the power cable: Find the appropriate power cable that came with your power supply unit (PSU). It should have a connector suitable for your SSD’s power socket.
- Connect the power cable: Align the power cable connector with the power socket on your SSD and gently push it in until it is securely attached.
- Secure the cable: Use any included fastening clips or ties to secure the power cable, keeping it tidy and preventing accidental disconnection.
Connecting The Data Cable To The Motherboard
With the power cable securely attached, it’s time to connect the data cable between your SSD and the motherboard.
Follow these simple steps:
- Locate the data connector: Find the data connector on your SSD that you identified earlier. Take note of its location and shape for the next step.
- Identify the corresponding port on the motherboard: Look for a similar-shaped socket on your motherboard. It should be labeled with the SATA designation.
- Connect the data cable: Align the data cable connector with the SATA port on the motherboard and gently push it in until it is securely attached.
- Secure the cable: Again, use any provided fastening clips or ties to secure the data cable, ensuring it stays connected and organized within your system.
You have successfully connected the power and data cables for your PCIe SSD. At this point, you can proceed with other necessary steps, such as securing the SSD in your computer case and powering on your system.
Enjoy the benefits of increased storage speed and performance with your new PCIe SSD installation.
Configuring The Bios And Installing Drivers
Learn how to configure the BIOS and install drivers for your PCIe SSD. This step-by-step guide will help you optimize performance and ensure a smooth installation process.
After physically installing your PCIe SSD, the next step is to configure the BIOS and install the necessary drivers. This will ensure that your system recognizes the SSD and allows you to utilize its full potential.
Follow the steps below to successfully configure the BIOS and install the drivers:
Accessing The Bios Settings
To configure the BIOS, you’ll need to access the BIOS settings.
Here’s how you can do it:
- Restart your computer and press the appropriate key (usually Del, F2, or F10) to enter the BIOS.
- Navigate to the “Boot” or “Boot Settings” section using the arrow keys.
- Locate the “Boot Priority” or “Boot Order” option and select it.
- Change the boot priority sequence to make the PCIe SSD the primary boot drive, ensuring that it is set to the top of the list.
- Save the changes and exit the BIOS settings, usually by pressing F10.
Enabling The Pcie Ssd As The Primary Boot Drive
Once you’ve accessed the BIOS settings, it’s important to set the PCIe SSD as the primary boot drive to ensure that your system boots from it.
Here’s how:
- In the BIOS settings, navigate to the “Storage” or “Storage Configuration” section.
- Locate the PCIe SSD in the list of storage devices.
- Set the PCIe SSD as the primary boot drive by moving it to the top of the boot order list, if it’s not already there.
- Save the changes and exit the BIOS settings.
Checking For Driver Updates And Installing Them
Updating and installing the necessary drivers is crucial to optimize the performance of your PCIe SSD.
Here’s what you should do:
- Open your favorite web browser and visit the manufacturer’s website for your PCIe SSD.
- Look for the “Support” or “Downloads” section on the website.
- Enter the model number or product name of your PCIe SSD to find the latest drivers.
- Download the updated drivers for your specific operating system.
- Once downloaded, double-click the driver installer file to start the installation process.
- Follow the on-screen instructions to complete the installation.
- Restart your computer to apply the changes.
By following these steps, you will successfully configure the BIOS to recognize your PCIe SSD as the primary boot drive and install the required drivers.
This ensures that your system is fully optimized to take advantage of the speed and performance benefits offered by a PCIe SSD.
Tips For Troubleshooting
Learn how to install a PCIe SSD with these helpful troubleshooting tips. From checking compatibility to proper installation techniques, this guide will help you navigate the process and ensure a successful upgrade for your system.
No Detection of PCIe SSD:
- Check proper connection of SSD to PCIe slot and ensure it’s securely inserted.
- Test PCIe slot with another device to confirm functionality.
- Update motherboard’s BIOS to the latest version.
- Inspect and secure all SSD connections and cables.
Driver Compatibility:
- Visit the manufacturer’s website for updated SSD drivers.
- Install the latest driver version, following provided instructions.
- If issues persist, revert to a previously working driver version.
Insufficient Power Supply:
- Verify PSU wattage can support all system components, including the PCIe SSD.
- Ensure all power cables, including PCIe power connector, are securely connected.
- Consider upgrading to a higher wattage PSU if power problems persist.
BIOS Settings:
- Access BIOS settings during system boot by pressing the designated key (Del, F2, F10).
- Confirm BIOS recognizes the PCIe SSD; update BIOS if necessary.
- Enable the PCIe slot in BIOS settings, following manufacturer’s instructions.
- Troubleshooting may involve trial and error; try multiple solutions if needed.
- Seek professional help or contact manufacturer’s customer support if issues persist.
Remember, troubleshooting installation issues may require trial and error. If one solution doesn’t work, move on to the next until you find the right fix. If you’re still facing difficulties, don’t hesitate to consult a professional or contact the manufacturer’s customer support for further assistance.
Conclusion
Installing a PCIe SSD can significantly improve your computer’s performance and storage capacity. With just a few simple steps, you can enjoy faster boot times, quicker file transfers, and enhanced overall system responsiveness.
First, ensure compatibility by checking your motherboard’s specifications. Then, gather the necessary tools and prepare yourself for the installation process. Disconnect the power supply, remove the computer case, and locate the appropriate PCIe slot.
Carefully insert the PCIe SSD, securing it in place with screws if required. Reassemble your computer, reconnect the power supply, and power it on.
Finally, initialize and format the new SSD in your operating system to start enjoying its benefits. Remember to back up your data and be cautious throughout the installation process.


