TRIM, Wear Leveling, and Over-Provisioning: SSD Basics for Beginners
Your SSD felt blazing fast when you first installed it. Everything loaded instantly, boot times were incredible, and you wondered why you hadn’t made the switch from an HDD sooner. But a few months or a year later, something feels off. Writes seem a little slower. You’ve heard people talk about “SSD degradation” and wondered if your drive is already dying.
It probably isn’t. What’s more likely is that one or more of the background maintenance technologies your SSD relies on aren’t working optimally. Three features in particular keep your solid-state drive healthy, fast, and long-lived: TRIM, wear leveling, and over-provisioning. If you’ve already made the jump from an HDD to an SSD, understanding these three concepts will help you get the most out of your investment for years to come.
Why SSDs Need Housekeeping in the First Place
To understand TRIM, wear leveling, and over-provisioning, you first need to know one fundamental truth about flash memory: SSDs can’t simply overwrite data like hard drives can.
A traditional hard drive writes data magnetically. When you want to replace old data, the drive head just writes new magnetic patterns over the old ones. Simple. An SSD, on the other hand, stores data in NAND flash cells organized into pages and blocks. Individual pages can be written to, but data can only be erased at the block level. A single block might contain 128 or 256 pages.
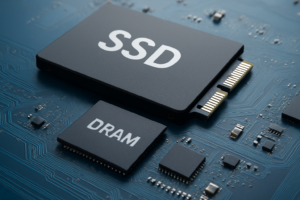
This creates a problem. If your SSD needs to write new data to a block that still contains some valid (in-use) pages, it has to read the entire block into a cache, erase the whole block, and then write back the valid data along with the new data. This process is called write amplification, and it’s the root cause of SSD slowdowns over time. If you’ve noticed your drive getting sluggish, our guide on why your SSD slows down over time and how to fix it covers this in more detail.
TRIM, wear leveling, and over-provisioning all exist to minimize write amplification and keep your SSD performing like it did on day one.
TRIM: Telling Your SSD What’s Actually Deleted
When you delete a file on your computer, the operating system doesn’t actually erase the data. It simply marks that space as “available” in its own file table. The OS knows that space is free, but the SSD doesn’t. As far as the drive’s controller is concerned, those cells still hold valid data that needs to be preserved.
This is where TRIM comes in. TRIM is a command that your operating system sends to the SSD, telling it exactly which blocks of data are no longer needed. Once the SSD receives this information, it can erase those blocks during idle time, so they’re clean and ready for new writes. This process is sometimes called “garbage collection,” though technically garbage collection is the SSD’s internal process that actually does the cleaning, while TRIM is the communication that makes it efficient.
How TRIM Works in Practice
Let’s say you delete a 2GB video file. Without TRIM, your SSD still treats those cells as occupied. Later, when you need to write new data, the controller has to perform that expensive read-erase-rewrite cycle on those blocks. With TRIM enabled, the OS immediately tells the SSD, “Hey, these blocks are free.” The SSD’s garbage collector can then erase them in the background, and when you finally write new data, it goes straight to clean, pre-erased blocks. Fast and efficient.
Is TRIM Enabled on Your System?
The good news is that most modern operating systems enable TRIM by default:
- Windows 10/11: TRIM is on by default. You can verify by opening Command Prompt as administrator and typing
fsutil behavior query DisableDeleteNotify. If the result is 0, TRIM is active. - macOS: TRIM has been enabled by default for Apple-branded SSDs since OS X 10.6.8, and for third-party SSDs since OS X El Capitan (10.11).
- Linux: Most modern distributions support TRIM, but you may need to enable it manually through fstab options or a periodic TRIM timer using
fstrim.
One important caveat: TRIM makes it much harder to recover deleted files. Once the SSD erases those blocks, the data is gone for good. If you’re planning to securely wipe a drive before selling it, TRIM actually works in your favor. But if you’re worried about accidental deletion, make sure you have a good backup strategy in place.
Wear Leveling: Spreading the Workload Evenly
Every NAND flash cell in your SSD has a limited number of program/erase (P/E) cycles before it wears out. Consumer-grade TLC (triple-level cell) NAND typically handles around 1,000 to 3,000 P/E cycles per cell. QLC (quad-level cell) drives may handle even fewer, sometimes around 500 to 1,000 cycles. That sounds alarming, but your SSD has billions of cells, and real-world SSD lifespan data shows most drives outlast their warranty period by a wide margin.
Still, there’s a potential problem. Without any management, your operating system would tend to write to the same logical addresses over and over. Think about system log files, temp folders, and swap files. These are constantly being written and rewritten. If those writes always hit the same physical cells, those cells would wear out fast while the rest of the drive sat nearly untouched.
Wear leveling prevents this by distributing writes across all available NAND cells as evenly as possible. The SSD controller manages a mapping table that translates logical block addresses (what your OS thinks of as “where” data is) to physical NAND locations. When writing data, the controller can direct those writes to less-used cells, keeping the wear count balanced across the entire drive.
Two Types of Wear Leveling
Dynamic wear leveling only moves data among blocks that are already available for writing. It shuffles new writes to the least-used free blocks. This is simpler but has a limitation: blocks containing static data (like your operating system files that rarely change) never get rotated.
Static wear leveling is more aggressive and more effective. It occasionally moves static, rarely-changed data to more heavily worn cells, freeing up the fresher cells for new writes. This ensures that even cells holding your OS installation or other long-term data participate in the wear distribution. Every decent modern SSD uses static wear leveling.
What This Means for You
You don’t need to do anything to enable wear leveling. It’s handled entirely by the SSD’s firmware controller. But understanding it helps explain a few things:
- Your SSD does background work even when you think it’s idle. It’s shuffling data around for wear optimization.
- Filling your SSD to near-maximum capacity gives the controller fewer options for distributing writes, making wear leveling less effective.
- SSDs with higher-quality controllers (like those in the Samsung 990 Pro or WD_BLACK SN850X) tend to have better wear leveling algorithms.

Samsung 990 Pro 2TB NVMe SSD
Excellent controller with advanced wear leveling and one of the best endurance ratings in its class
Over-Provisioning: Hidden Space That Keeps Your SSD Healthy
If you’ve ever bought a 1TB SSD and noticed it only shows about 931GB of usable space, part of that discrepancy comes from the usual binary-vs-decimal math (1 TB = 1,000 GB in marketing terms, but 931 GiB in actual binary). But there’s an additional chunk of space you never see at all, and it’s reserved on purpose. This is over-provisioning.
Over-provisioning (OP) is a percentage of the SSD’s total NAND flash capacity set aside exclusively for the controller’s internal use. You can’t access it. It doesn’t show up in Disk Management or Finder. It’s the controller’s private workspace.
What Over-Provisioning Actually Does
That reserved space serves three critical purposes:
- Garbage collection efficiency: The controller uses OP space as a staging area when reorganizing blocks. More OP means more room to shuffle data during garbage collection, which means less write amplification.
- Wear leveling headroom: Extra spare blocks give the controller more options for distributing writes evenly. Think of it like having more seats in a game of musical chairs.
- Bad block replacement: When a NAND cell eventually wears out, the controller quietly retires it and replaces it with one from the over-provisioned reserve. This happens transparently, and your usable capacity stays the same until the reserves run low.
Most consumer SSDs ship with about 7% over-provisioning. Enterprise SSDs often have 28% or more, which is one reason they carry much higher endurance ratings despite sometimes using the same NAND chips.
Can You Increase Over-Provisioning?
Yes, and it’s easier than you might think. Many SSD manufacturers include a utility that lets you manually allocate additional over-provisioning. Samsung’s Magician software, for instance, has a dedicated OP setting. You can also achieve the same effect simply by leaving a portion of your drive unpartitioned. If you have a 1TB drive and only create a 900GB partition, the remaining space effectively acts as additional over-provisioning.
For most home users, the factory default OP is sufficient. But if you’re running a write-intensive workload (like a database server, video editing scratch disk, or heavy virtual machine use), bumping OP up to 10-15% can meaningfully extend your drive’s performance consistency and lifespan.
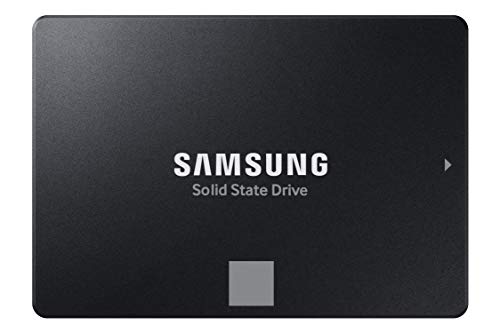
Samsung 870 EVO 1TB SATA SSD
Excellent value SATA SSD with Samsung Magician software for easy over-provisioning management
How These Three Features Work Together
TRIM, wear leveling, and over-provisioning aren’t isolated features. They form an interconnected system that keeps your SSD running well. Here’s how they interact:
When you delete files, TRIM tells the controller which blocks are free. The controller’s garbage collection process uses the over-provisioned space as a buffer to consolidate valid data and erase freed blocks. Meanwhile, wear leveling ensures that all these write and erase operations are distributed across NAND cells evenly, using spare blocks from the over-provisioned pool when needed.
Remove any one of these, and the others become less effective. Without TRIM, the controller doesn’t know which blocks are truly free, so garbage collection works blind. Without sufficient over-provisioning, wear leveling has fewer blocks to rotate through. Without wear leveling, some cells die prematurely even with TRIM and OP working perfectly.
This is also why keeping your SSD from getting too full matters so much. When you fill a drive past 80-85% capacity, you’re effectively squeezing the space available for garbage collection and wear leveling. The controller has fewer free blocks to work with, write amplification increases, and performance drops. If you’re choosing between a 1TB or 2TB SSD, going with the larger drive gives you more breathing room for these maintenance processes.
Practical Tips to Keep Your SSD Healthy
You don’t need to fuss over your SSD like a newborn, but a few simple habits will help these background technologies do their best work.
1. Don’t Fill Your SSD Past 75-80%
This is the single most impactful thing you can do. Keeping 20-25% of your drive free gives the controller plenty of room for garbage collection and wear leveling. If you’re constantly running out of space, consider using an SSD alongside an HDD, keeping your OS and frequently used apps on the SSD while storing large files on a traditional hard drive.
2. Make Sure TRIM Is Enabled
Check your operating system’s TRIM status using the methods described above. If you’re on Linux, set up a weekly fstrim cron job or enable the fstrim.timer systemd service.
3. Keep Your SSD Firmware Updated
Firmware updates often include improved garbage collection algorithms and better wear leveling logic. Check your manufacturer’s website or use tools like Samsung Magician, Crucial Storage Executive, or WD Dashboard periodically.
4. Avoid Unnecessary Writes
You don’t need to be paranoid about every write operation, but some common-sense adjustments help:
- Disable disk defragmentation for SSDs (Windows 10/11 handles this automatically by sending TRIM commands instead of defragging).
- Move browser cache and temporary file directories to a secondary HDD if you have one.
- Avoid running constant benchmarks or stress tests. Each one writes gigabytes of data for no practical benefit beyond the first test.
5. Monitor Your Drive’s Health
Use tools like CrystalDiskInfo (Windows) or smartmontools (Linux/Mac) to check your SSD’s SMART data. Pay attention to the “Percentage Used” or “Wear Leveling Count” attributes. These tell you how much of your drive’s rated endurance you’ve consumed. Most users will find they’ve barely made a dent after several years of normal use.

Crucial T700 2TB Gen5 NVMe SSD
Top-tier Gen5 drive with excellent endurance and Crucial Storage Executive software for health monitoring
SSD Maintenance Myths You Can Ignore
A lot of outdated advice circulates online about SSD care. Here’s what you can safely disregard:
“You should manually run TRIM regularly.” On Windows and macOS, this happens automatically. You don’t need to schedule it or run it manually unless you’re on an older Linux distribution without automatic TRIM support.
“SSDs wear out quickly with daily use.” A modern 1TB SSD rated for 600 TBW (terabytes written) would let you write over 300GB per day for five years before hitting its endurance limit. Most people write 20-40GB per day. You’ll almost certainly replace the drive for capacity reasons before it wears out.
“You need to disable the page

James Kennedy is a writer and product researcher at Drives Hero with a background in IT administration and consulting. He has hands-on experience with storage, networking, and system performance, and regularly improves and optimizes his home networking setup.